US 408 365 4638

Streamlining Communication with Masstransit and RabbitMQ

Table of Contents

Introduction:

In today’s distributed system landscape, efficient communication between microservices is crucial for maintaining scalability, reliability, and performance. In this technical blog, we’ll delve into how Masstransit and RabbitMQ can be combined to streamline communication within microservices architecture.


Introduction to RabbitMQ:

Overview of RabbitMQ:

RabbitMQ is a highly reliable message broker that acts as an intermediary for communication between distributed applications. It implements the Advanced Message Queuing Protocol (AMQP), a standardized messaging protocol, making it interoperable with a wide range of platforms and languages.

Message Queues, Exchanges, and Bindings:

  • Message Queues: RabbitMQ uses message queues to store and route messages between producers and consumers. Messages are placed in queues until they are consumed by subscribers.
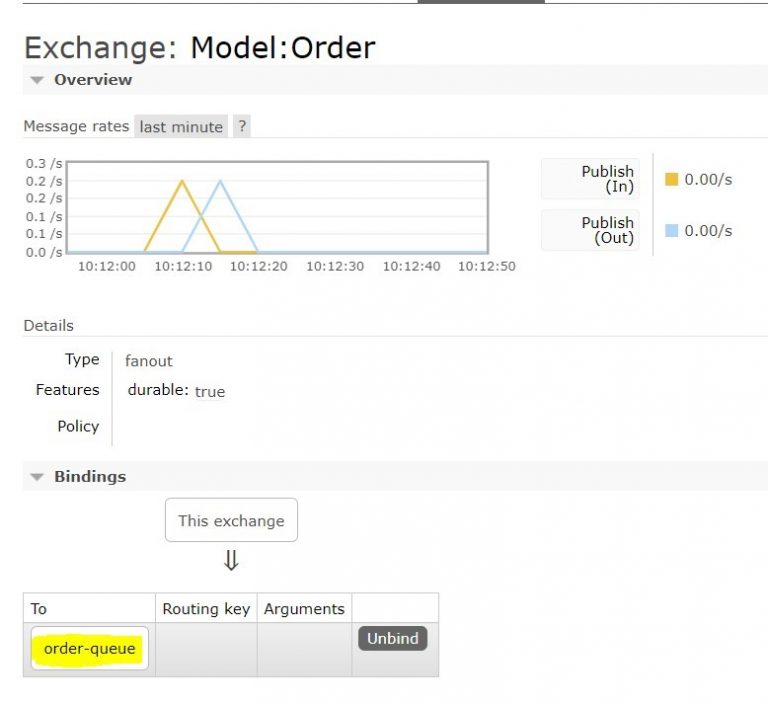
  • Exchanges: Exchanges receive messages from producers and route them to the appropriate queues based on routing rules.
  • Bindings: Bindings define the relationship between exchanges and queues, determining how messages are routed.

Why To Use RabbitMQ:

Reliable Messaging:

RabbitMQ ensures reliable message delivery by providing features such as message acknowledgment, message persistence, and message retry mechanisms.

Message Routing and Filtering:

RabbitMQ supports flexible message routing and filtering based on message attributes and patterns. This allows messages to be selectively routed to specific queues or consumers based on predefined criteria.

Installing RabbitMQ through Docker:

To install RabbitMQ locally using Docker, you can follow these steps:

  • Install Docker:

Make sure you have Docker installed on your machine. You can download and install Docker from the official website: Docker.

  • Pull RabbitMQ Image:

Open a terminal or command prompt and run the following command to pull the official RabbitMQ Docker image from Docker Hub:

docker pull rabbitmq
  • Run RabbitMQ Container:

Once the image is downloaded, you can run a RabbitMQ container using the following command:

docker run -d --name my-rabbit -p 5672:5672 -p 15672:15672 rabbitmq
  • -d: Run the container in the background.
  • –name my-rabbit: Assign a name to the container (you can choose any name).
  • -p 5672:5672: Map the RabbitMQ default port for AMQP (5672).
  • -p 15672:15672: Map the port for the RabbitMQ management plugin (15672).
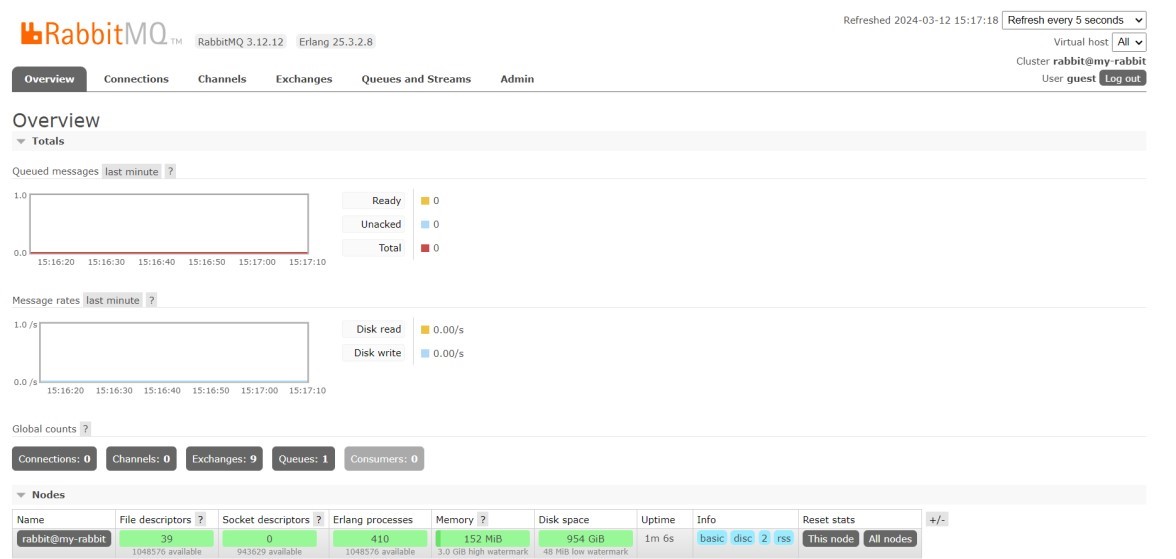
  • Access RabbitMQ Management Console:

You can access the RabbitMQ Management Console by opening your web browser and navigating to http://localhost:15672. The default credentials are:

  • Username: guest
  • Password: guest

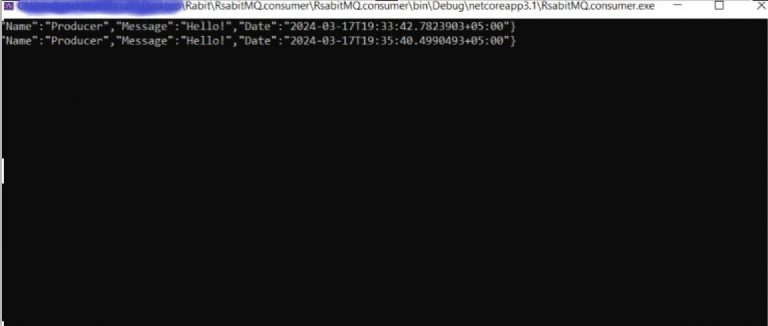
Practical Example of Message Passing using RabbitMQ

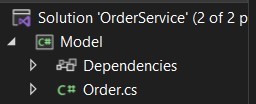
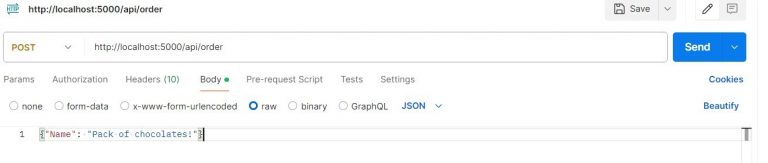
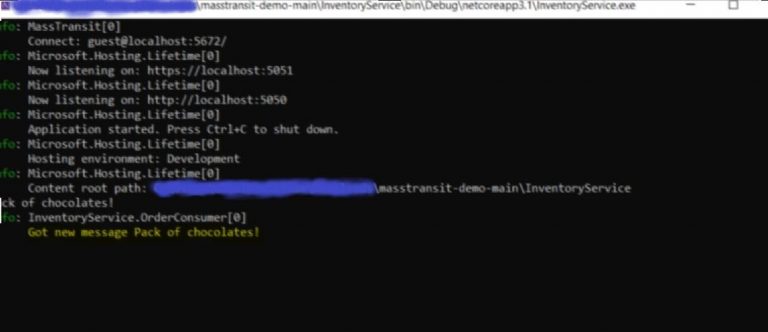
Develop two console applications: one serving as the producer and the other as the consumer. The producer application will be responsible for sending messages to RabbitMQ, while the consumer application will retrieve those messages.”

Note: You will need to install a Nuget package RabbitMQ.client

Following is the Producer code that produce message:

RabbitMQproducer/Program.cs

				
					using Newtonsoft.Json;
using RabbitMQ.Client;
using System;
using System.Text;
namespace RabitMQ.Producer
{
static class Program
 {
 static void Main(string[] args)
 {
 var factory = new ConnectionFactory()
 {
 Uri = new Uri("amqp://guest:guest@localhost:5672")
 };
 using var connection = factory.CreateConnection();
 using var channel = connection.CreateModel();
 channel.QueueDeclare("demo-queue",
 durable: true,
 exclusive: false,
 autoDelete: false,
 arguments: null);
 var message = new { Name = "Producer", Message = "Hello!", Date = 
DateTime.Now };
 var body = 
Encoding.UTF8.GetBytes(JsonConvert.SerializeObject(message));
 channel.BasicPublish("", "demo-queue", null, body);
 }
 }


ConnectionFactory:

  • An instance of ConnectionFactory is created to configure the RabbitMQ connection parameters. It specifies the URI of the RabbitMQ server (amqp://guest:guest@localhost:5672).

Connection and Channel Creation:

  • Using the connection factory, a connection to the RabbitMQ server is established (CreateConnection()). The using statement ensures that the connection is automatically disposed of when it’s no longer needed.
  • A channel is created on the connection (CreateModel()), which is used for most of the API calls.

Queue Declaration:

  • The QueueDeclare method is used to declare the queue named “demo-queue”. It specifies options such as durability, exclusivity, and autodeletion.

Message Preparation:

  • A message object is created using an anonymous type with properties for the name of the producer, a message, and the current date/time.
  • The message object is serialized to JSON using SerializeObject, and the result is encoded as UTF-8 bytes.

Message Publishing:

  • The BasicPublish method sends the serialized message body to the

“demo-queue”. The “” parameter specifies the default exchange, and the “demo-queue” parameter specifies the routing key (queue name). The null parameter indicates no message properties are set.

Following is the Consumer code that consume message:

				
					RabbitMQconsumer/Program.cs
using Newtonsoft.Json;
using RabbitMQ.Client;
using System;
using System.Text; 

namespace RabitMQ.Producer 
{     
static class Program 
    {         
      static void Main(string[] args) 
        {             
          var factory = new ConnectionFactory() 
            { 
                Uri = new Uri("amqp://guest:guest@localhost:5672") 
            };
                using var connection = factory.CreateConnection();
             using var channel = connection.CreateModel();
             channel.QueueDeclare("demo-queue",
                 durable: true,
                 exclusive: false,
                 autoDelete: false,
                 arguments: null); 
            var message = new { Name = "Producer", Message = "Hello!", Date = DateTime.Now };
             var body = 
Encoding.UTF8.GetBytes(JsonConvert.SerializeObject(message)); 
 
            channel.BasicPublish("", "demo-queue", null, body); 
        } 
    } 
} 


ConnectionFactory:

  • An instance of ConnectionFactory is created to configure the RabbitMQ connection parameters. It specifies the URI of the RabbitMQ server (amqp://guest:guest@localhost:5672).


Connection and Channel Creation:

  • Using the connection factory, a connection to the RabbitMQ server is established (CreateConnection()). The using statement ensures that the connection is automatically disposed of when it’s no longer needed.


  • A channel is created on the connection (CreateModel()), which is used for most of the API calls.


Queue Declaration:

  • The QueueDeclare method is used to declare the queue named “demo-queue”. It specifies options such as durability, exclusivity, and autodeletion.


EventingBasicConsumer:

  • An instance of EventingBasicConsumer is created, which is a consumer that raises events upon message delivery.


  • The Received event handler is attached to the consumer. When a message is received, the handler extracts the message body, decodes it as a UTF-8 string, and prints it to the console.


BasicConsume:

  • The BasicConsume method starts consuming messages from the “demo-queue”. It specifies the queue name, whether messages should be acknowledged automatically (true), and the consumer instance to handle received messages.


Console.ReadLine:

  • The ReadLine statement keeps the application running so that it continues to listen for messages until the user presses Enter.

Now run both the console Applications together and producer application will produce the HELLO message and consumer application will consume this message through RabbitMQ queue and will print it

The pitch in the RabbitMQ demo-queue shows that data has been received successfully in the Queue

The consumer application has received the data successfully and printed it.

What is Mass Transit? MassTransit is a free, open-source distributed application framework for .NET. It’s a service bus for sending messages between different parts of your application, or even across different applications. With MassTransit, you can implement various messaging patterns such as publish/subscribe, request/response, and more, using a consistent and easy-to-understand API. Key Features:
  • Message-based Communication
  • Fault Tolerance
  • Scalability
  • Integration Capabilities

Practical Example of Message Passing using MassTransit

Getting Started
  • Creating two Web API projects one as Order Service and other as Inventory Service
  • Order Service will be responsible for sending messages using rabbitMQ as a message broker through Mass Transit.
  • Inventory Service will Consume the Order data from the Queue through Mass Transit
  • Shared Order Model has been created which will be used as a data model.
 

Installation

Install the following Nuget packages in your .NET project.
  • MassTransit
  • AspNetCore
  • RabbitMQ
  • Extensions.DependencyInjection
1- Configure the RabbitMQ instance in the Startup.cs class of OrderService

OrderService/Startup.cs

				
					public void ConfigureServices(IServiceCollection services)
 {
 services.AddControllers();
 services.AddMassTransit(config => {
 config.UsingRabbitMq((ctx, cfg) => {
 cfg.Host("amqp://guest:guest@localhost:5672");
 });
 });
 services.AddMassTransitHostedService();
 }


2- Create a new Controller<strong> OrderController.cs</strong> in Controllers folder.

OrderController.cs

				
					using System;
using System.Collections.Generic;
using System.Linq;
using System.Threading.Tasks;
using MassTransit;
using Microsoft.AspNetCore.Mvc;
using Model;
// For more information on enabling Web API for empty projects, visit 
https://go.microsoft.com/fwlink/?LinkID=397860
namespace OrderService.Controllers
{
 [Route("api/[controller]")]
 [ApiController]
 public class OrderController : ControllerBase
 {
 private readonly IPublishEndpoint publishEndpoint;
 public OrderController(IPublishEndpoint publishEndpoint)
 {
 this.publishEndpoint = publishEndpoint;
 }
  // GET: api/<OrderController>
 [HttpGet]
 public IEnumerable<string> Get()
 {
 return new string[] { "value1", "value2" };
 }
 // GET api/<OrderController>/5
 [HttpGet("{id}")]
 public string Get(int id)
 {
 return "value";
 }
 // POST api/<OrderController>
 [HttpPost]
 public async Task<IActionResult> Post([FromBody] Order order)
 {
 await publishEndpoint.Publish<Order>(order);
 return Ok();
 }
 // PUT api/<OrderController>/5
 [HttpPut("{id}")]
 public void Put(int id, [FromBody] string value)
 {
 }
 // DELETE api/<OrderController>/5
 [HttpDelete("{id}")]
 public void Delete(int id)
 {
 }
 }
}


3- Now for the InventoryService configure the RabbitMQ consumer in Startup.cs of InventoryService.

InventoryService/Startup.cs

				
					public void ConfigureServices(IServiceCollection services)
 {
 services.AddControllers();
 services.AddMassTransit(config => {
 config.AddConsumer<OrderConsumer>();
 config.UsingRabbitMq((ctx, cfg) => {
 cfg.Host("amqp://guest:guest@localhost:5672");
 cfg.ReceiveEndpoint("order-queue", c => {
 c.ConfigureConsumer<OrderConsumer>(ctx);
 });
 });
 });
 services.AddMassTransitHostedService();
 }


4- Add OrderConsumer.cs class that will be responsible to consume the Order message from the order queue.

InventoryServie/OrderConsumer.cs

				
					using MassTransit;
using Microsoft.Extensions.Logging;
using Model;
using System;
using System.Threading.Tasks;
namespace InventoryService
{
 internal class OrderConsumer : IConsumer<Order>
 {
 private readonly ILogger<OrderConsumer> logger;
 public OrderConsumer(ILogger<OrderConsumer> logger)
 {
 this.logger = logger;
 }
 public async Task Consume(ConsumeContext<Order> context)
 {
 await Console.Out.WriteLineAsync(context.Message.Name);
 logger.LogInformation($"Got new message 
{context.Message.Name}");
 }
 }
}


5- Add shared Order Model Project in both WebAPI projects

Model/Order.cs

				
					using System;
namespace Model
{
 public class Order
 {
 public string Name { get; set; }
 }
}
				
			
6- Now Run both the web Applications and make a http POST request from postman sending message in Json format.
7- The message has been received on RabbitMQ in the form of Model:Order and has been exchanged to Order-queue.

8- The consumer has consumed the message from Order-queue and printed the message.

Thank You!

Related Post