There are two methods to connect your application with Dynamics CRM. First is using CRM SDK which provides build-in function and entities classes.
Second is to create customized Rest API calls.
1) CRM SDK Using Late-Binding Approach
The Entity class contains the logical details of the entity and its attributes. This lets you use late binding approach so that you can work with your customize entities and their attributes which are not present in the basic application. The SDK assemblies are available for your Visual Studio project as NuGet packages.
You need to install “Microsoft.CrmSdk.CoreAssemblies” from NuGet Packages. This will work with .Net Version 4.6.2 and above.
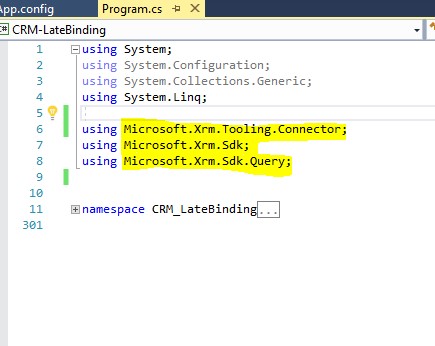
You need to use the following assemblies in your code.
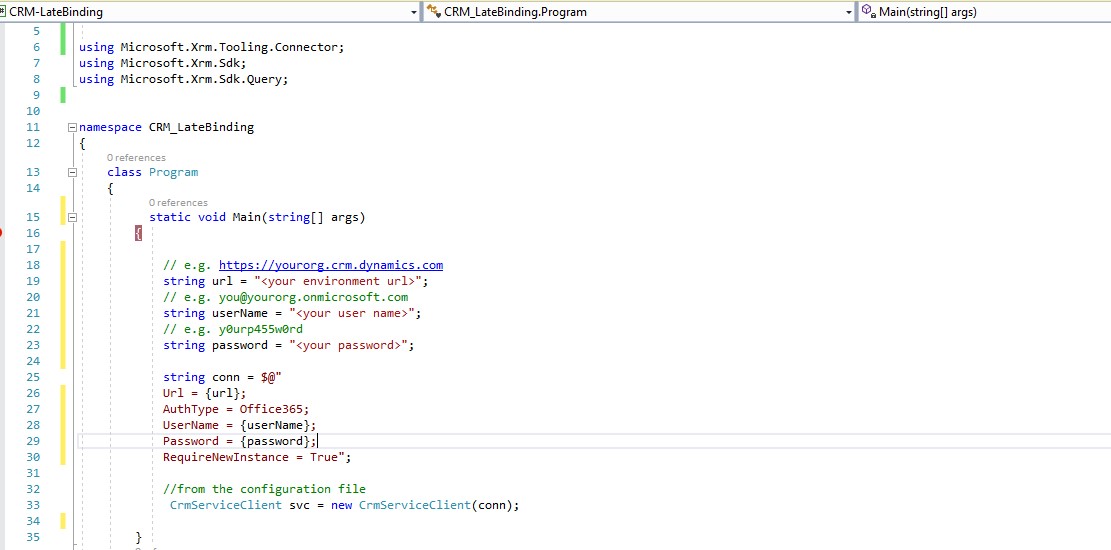
First, you need to get authenticated client service by your account credentials.
Update the following information for your environment. You can get your environment URL in CRM account under:
Settings > Customization > Developer Resources.
Once the CRM service client connects to your organization account, you can perfume CRUD on your account at different Entities.
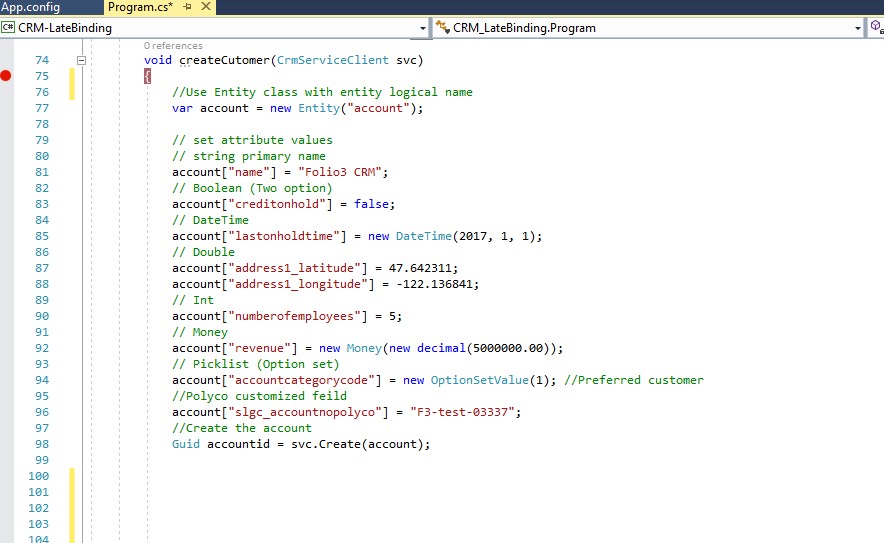
2) Create Entity
Following code is the example for creating an account on CRM.
From this URL: https://orgname.api.crm4.dynamics.com/api/data/v9.1 you can know all the entities and their attributes of your organization.
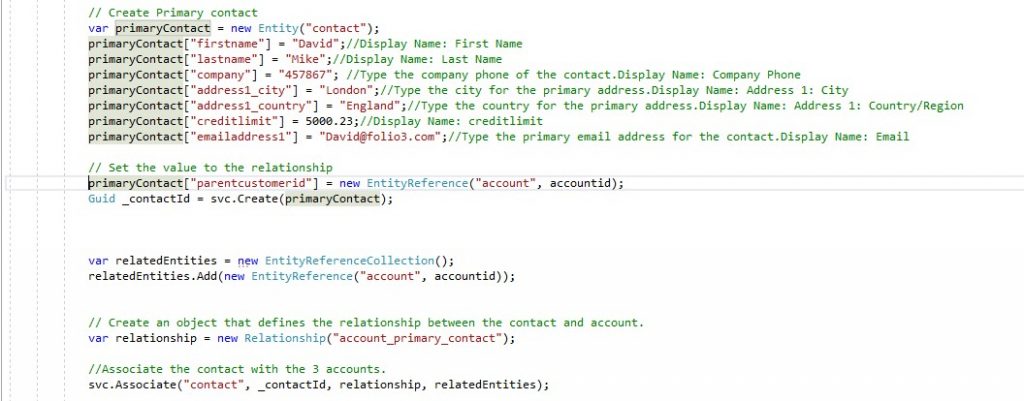
3) Associate Entities on Create
You can associate any new record with an existing record while creating it as well as updating it. But entities should be associated with each other. For example, you can create a primary contact entity along with account entity.
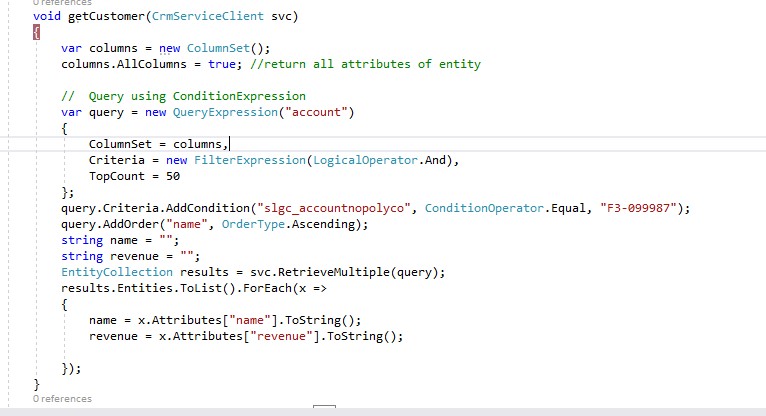
4) Retrieve an Entity
You can retrieve an Entity by any of its Attribute like name, id Or email using query expressions, also use multiple criteria.
5) Web API Sample (C#)
You need “serviceURl” “Username” “Password” and “ClientID” to make authorization call.
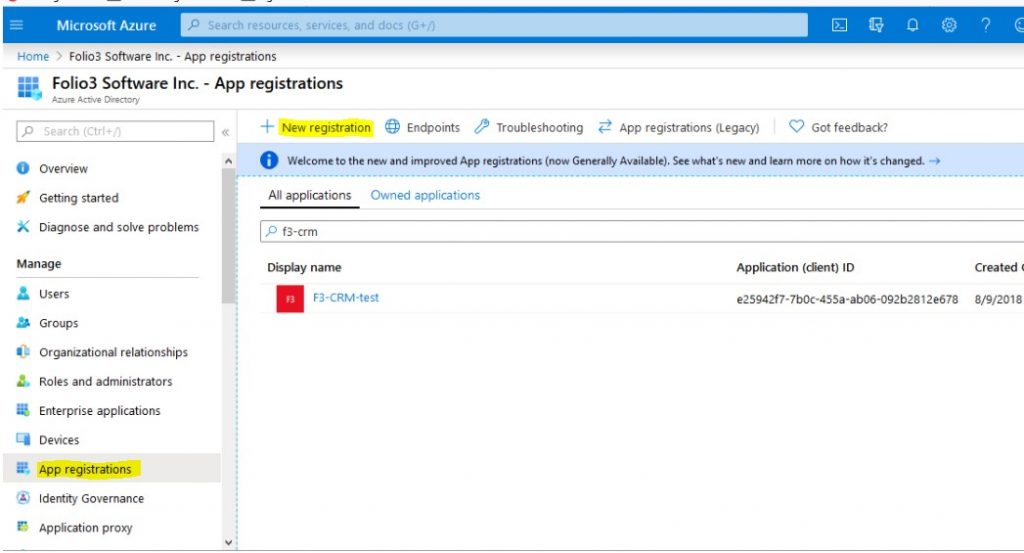
To get your ClientID to follow the below-mentioned steps.
Login to Azure Portal ( Use the same credentials as your dynamics CRM)
Once you have logged in, Navigate to the option “Azure Active Directory” and click on “App registration” than click on “New Registration”
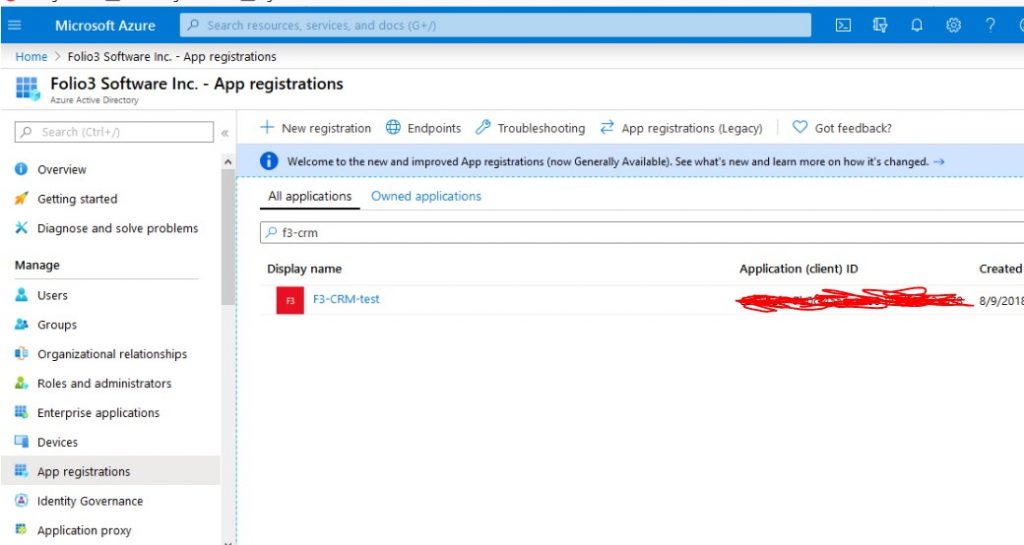
Here is your client ID:
6) Get Access Token
After the App registration, you will get the access token by the following call:
This call will generate Auth2.0 token.
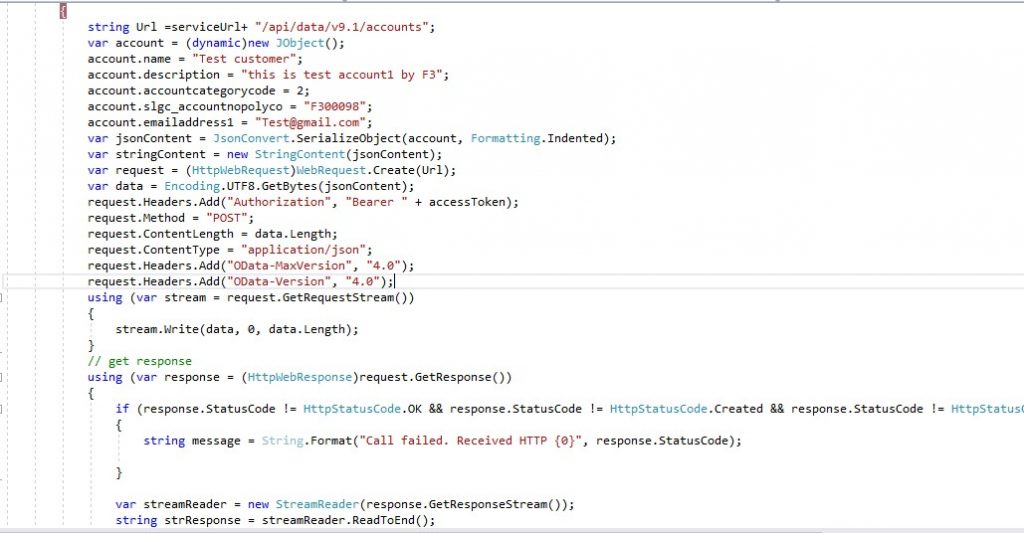
7) CRUD Operation Using Rest Calling
Once you get access token you can perform basic CRUD operation using REST calls. For creating an entity record following the POST call will work.
8) Retrieve an Entity
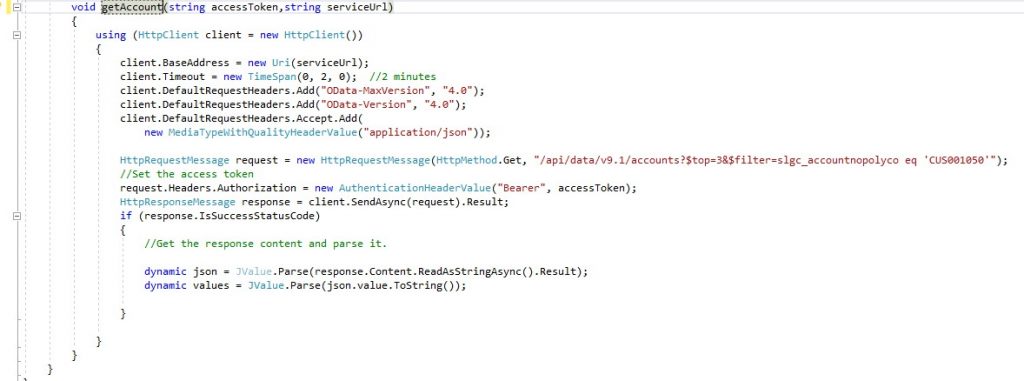
You can retrieve an Entity by any of its Attributes like name, id Or email using filters in GET call.
Conclusion
So there you have it. If you have a specific question, Please ask on the comment. Meanwhile, Please do share and like my post.
