The Business Central Server Administration tool is no longer available
The Business Central Server Administration tool is a Microsoft Management Console (MMC) snap-in for creating and managing Business Central Server instances. You were typically run the Business Central Server Administration tool by choosing Business Central Administration from the Start menu. Or, you could open the MMC first and then add the Business Central snap-in. In that case, choose Run from the Start menu and then specify the Microsoft Management Console that was steps before Business Central 2022 release wave 2.
There was an announcement on Microsoft Learn.
Starting in Business Central 2022 release wave 2 (v21), the Business Central Server Administration tool is no longer available. Use the Business Central Administration Shell instead.
So now Business Central Administration Tool is obsolete therefore certain cmdlets for Business Central version 22 are provided through Windows PowerShell to facilitate the installation and configuration of key deployment components, such as the Business Central Server, Web Server, databases, and extensions. These cmdlets are organized into three separate modules, all accessible via the Business Central Administration Shell.
- Administration Cmdlets for Business Central
- Administration Cmdlets for Business Central Web Server Instances
- Development Cmdlets for Business Central
To view a compilation of cmdlets that are either new or have been modified since Business Central version 21 (2022 release wave 2), refer to the ‘Cmdlet Changes in Business Central‘ resource.
That’s all from the basics. So, once you have completed the installation, as outlined in the provided steps in our previous article, you will need to perform a comprehensive configuration at the administration level. This includes tasks such as enabling SOAP services, activating debugging, and enabling OData Services, among others.
Launch the Business Central Cmdlets.
Run the PowerShell as Run as administrator from the Start menu. At the prompt, run the following command:
Command: Import-Module -Name “C:\Program Files\Microsoft Dynamics 365 Business Central\220\Service\navadmintool.ps1”
Note: You must run Windows PowerShell as “Run as Administrator” otherwise you will only be able to run limited developer commands. I have Business Central 2023 so my server instance is BC220 throughout this article.
Configuring Business Central Server after Installation
The Business Central Server Administration tool is no longer available. Using the Get-NAVServerConfiguration use to get configuration settings for the specified Business Central Server instance and Set-NAVServerConfiguration cmdlet configures settings for a Business Central Server instance.
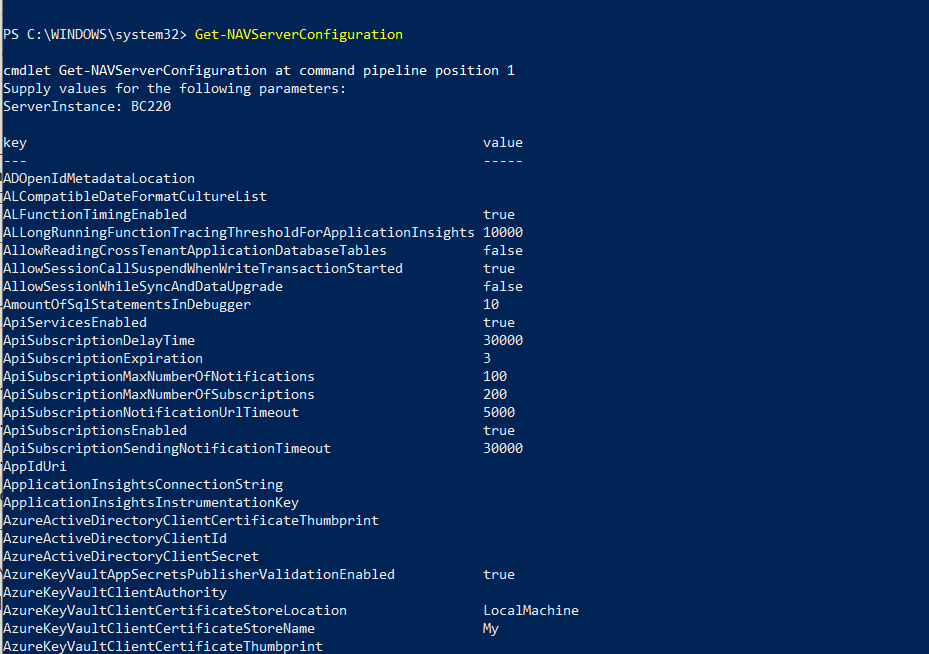
Get-NAVServerConfiguration
Returns configuration settings for the specified Business Central Server instance.
Command: Get-NAVServerConfiguration BC220
Set-NAVServerConfiguration:
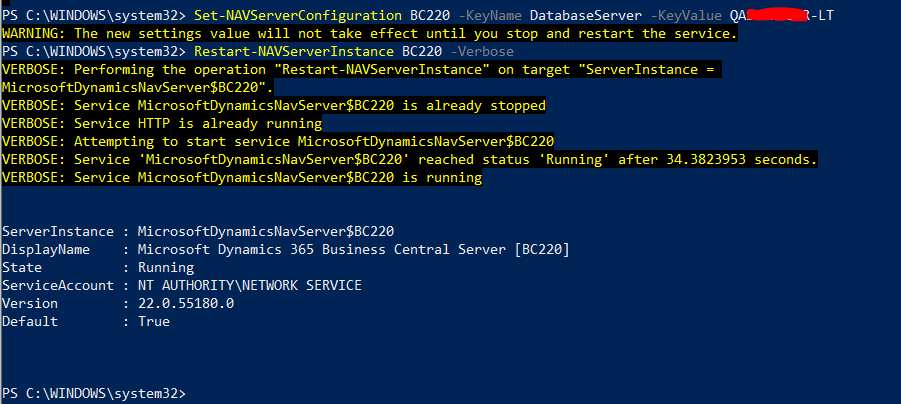
You can utilize the Set-NAVServerConfiguration cmdlet to set up configurations for a Business Central Server instance. These values are directly written to the instance’s configuration file, known as CustomSettings.config. Please note that changes to these settings will only become active once you restart the server instance.
Example: Checking Database Server and then setting new values. Current DatabaseServer value is “QA****SAR-LT”.

updating value to “QAISARF3-LT” and the new changes will not affect it without restarting the server.
![]()
Restarting the server ….

This failure is due to invalid database server name updated which is not existing. Now I am setting the valid database server name again to reflect properly.
Other related configurations can be done by below commands.
- Set Up a New Company
Use the New-NAVCompany cmdlet to create a new company in Business Central.
Command: New-NAVCompany BC220 -CompanyName “MyCompany” - User and Permission Set Management
Create users and assign permission sets using New-NAVServerUser and Add-NAVServerPermissionSet cmdlets.
Command:
New-NAVServerUser BC220 -UserName “User1” -Password “Password1”
Add-NAVServerPermissionSet BC220 -PermissionSetId “Basic” -UserId “User1”
- License Activation: Activate a license for Business Central using the Enable-NAVServerLicense
Command: Enable-NAVServerLicense BC220 -LicenseData “<YourLicenseKey>” - Service Configuration:
Enable and disable SOAP Services
Command: Set-NAVServerInstance BC220 -SoapServicesEnabled true - Enable NAS (Native Application Services) Debugging
Set-NAVServerInstance BC220 -Debugging “Enabled”
- Authentication Settings:
Configure authentication settings for web services.
Command: Set-NAVServerInstance BC220 -Authentication “Windows”- Authentication “Windows” means (To set Windows authentication): - Extension Management:
Install or uninstall extensions using Publish-NAVApp and Unpublish-NAVApp cmdlets
Enable the Developer Services Endpoints.
Enabling developer services endpoint in Business Central allows developers to access debugging, AL language features, and other development tools. To enable developer service endpoint in Business Central, follow these steps:
Command: Set-NAVServerInstance BC220 -DeveloperServicesPort 7049
- Enable Developer Debugging
Command: Set-NAVServerInstance BC220 -EnableDeveloperServiceDebugging $true
Restart the Service.
Verify the Developer Service Endpoint:
After the service restart, you can access the developer service endpoint by navigating to the following URL in a web browser:
http://localhost:7049/BC220/
You have successfully set up business central on your local computer. (Verify the port of this URL in IIS). For more information refer to the official documentation.
This article encompasses all the fundamental and essential configurations needed for a Business Central developer to commence customization and development on Business Central 2023 (Server Instance = BC220).
Thank you!