Introduction
An important task of Business Central is Printing Documents and Reports. Different ways of printing in Business Central are:
- Universal Print
- Email Print
- Browser Print
I am sharing here the steps to setup Email Print where Business Central can send print jobs to a printer using the printer’s email address. Let’s check the setup.
Step 1 – Setup Email Account
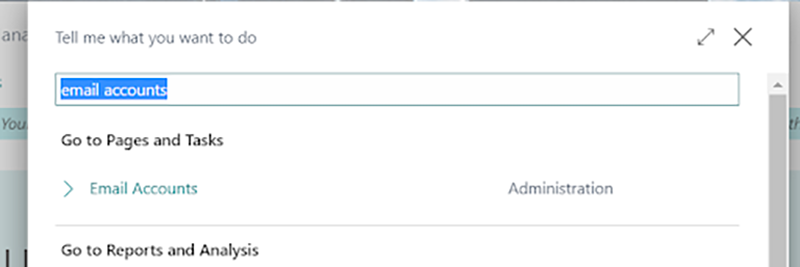
Search for ‘Email Accounts’
Click ‘New’ and ‘Add an email account’
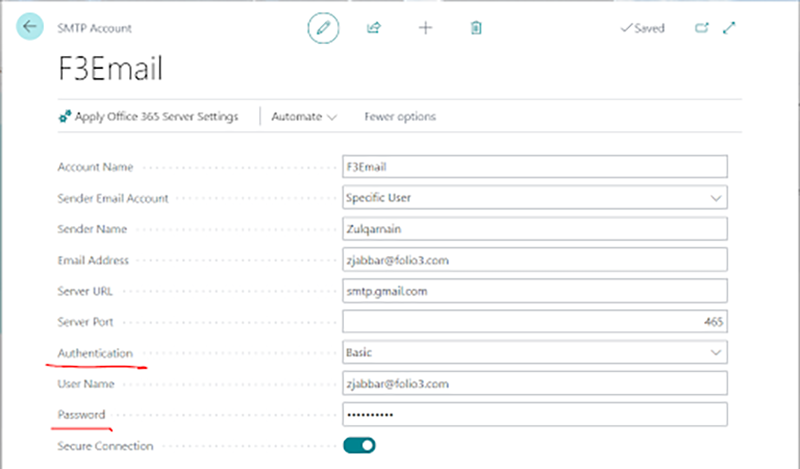
Enter sender details on form. Currently I am using ‘Basic’ auth with gmail SMTP settings and password is generated using gmail app
Gmail app password generation.

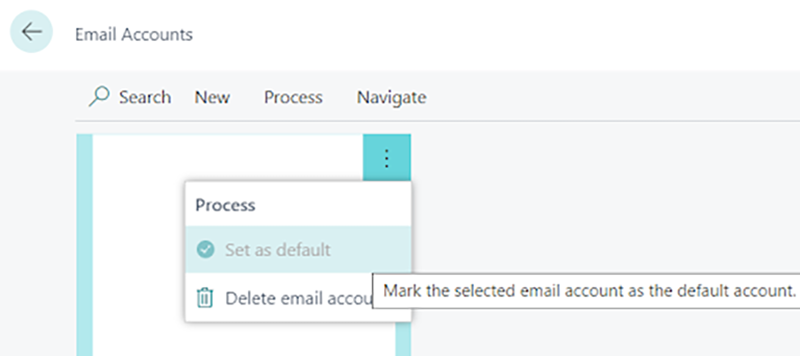
Set your email account as default in BC
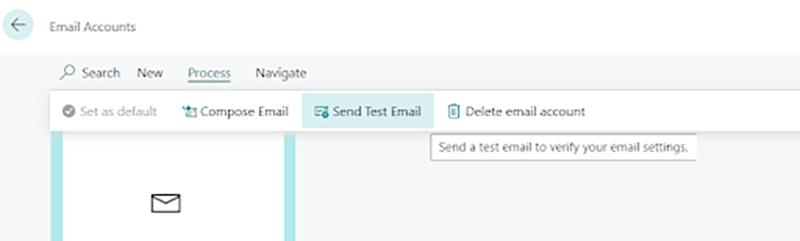
Send Test email.
Step 2 – Setup Email Printer
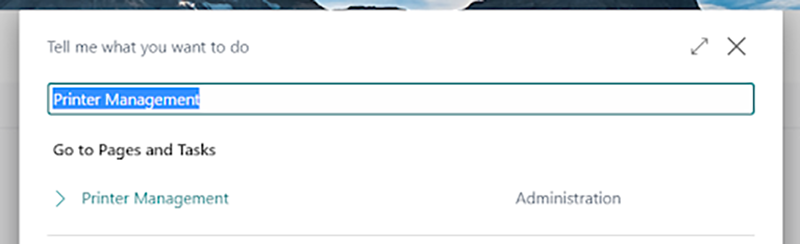
Search for ‘Printer Management’
Click on ‘Email Print’

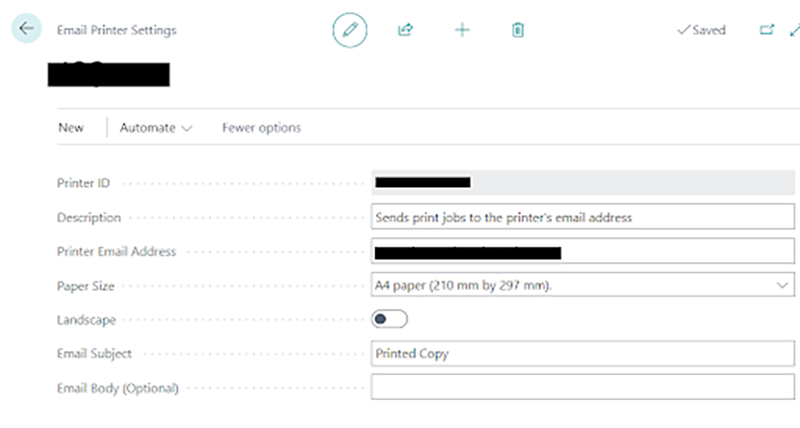
Enter details of printer with valid printer email id
Step 3 – Printing
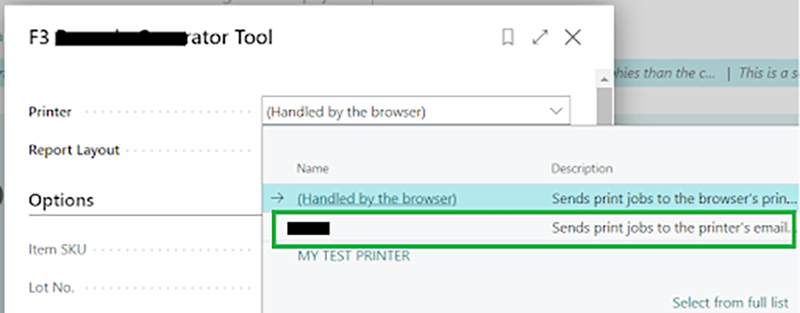
Open any report and send print request by selecting email printer.
Note: Test your printer email id first by sending a simple email to your printer email something like [email protected] You can use outlook or Gmail for this. Printer email should be accepting print requests out of BC first.
References
https://learn.microsoft.com/en-us/dynamics365/business-central/ui-specify-printer-selection-reports
https://learn.microsoft.com/en-ca/dynamics365/business-central/admin-how-setup-email