Introduction
Universal Print is a solution to the print requirement on cloud services from Microsoft. For non-compatible printers, universal print can be deployed with connector software.
Prerequisites
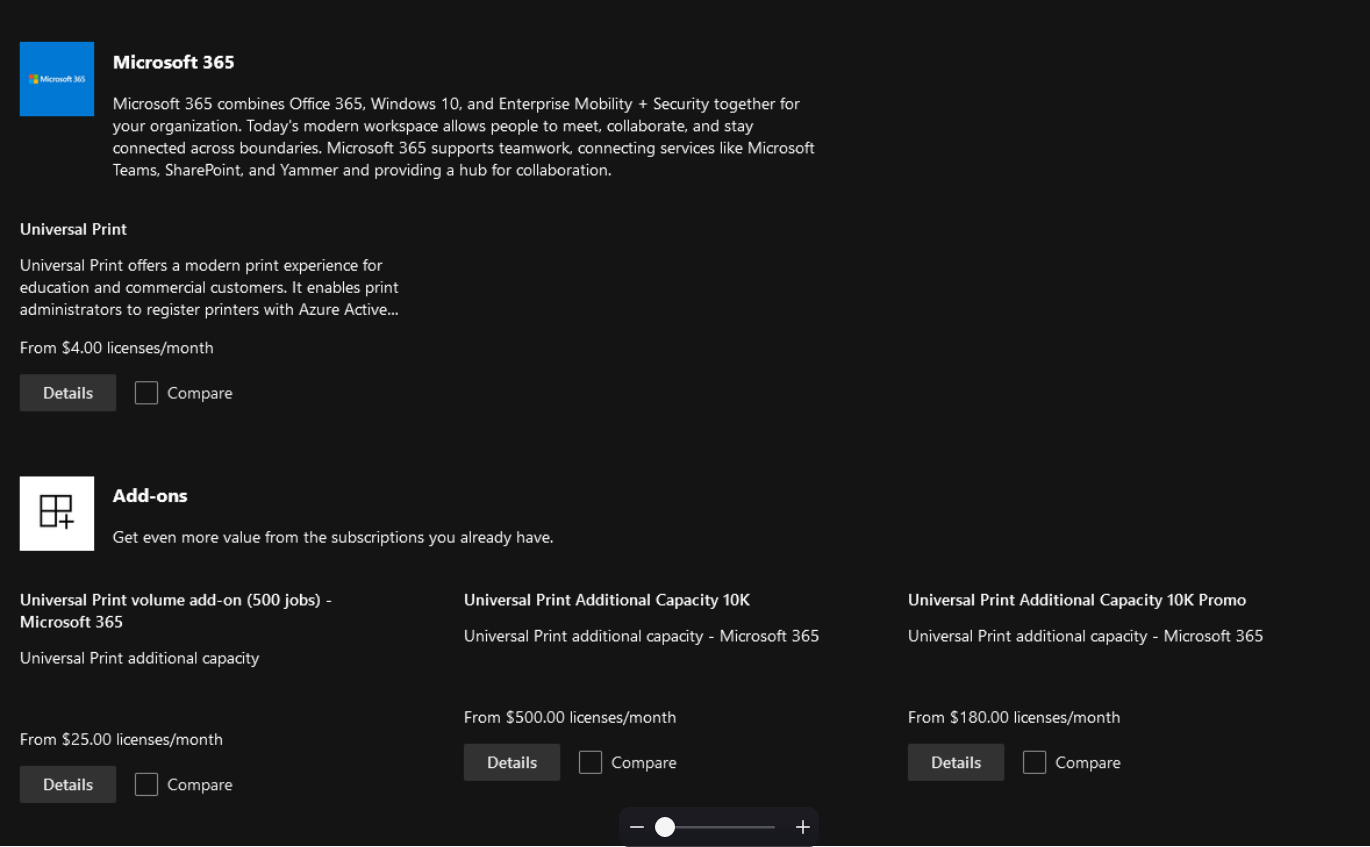
Universal Print License
Four possible subscriptions of Universal print are:
- Microsoft 365 Enterprise F3, E3, E5, A3, A5
- Windows 10 Enterprise E3, E5, A3, A5
- Microsoft 365 Business Premium
- Universal Print (standalone)
We will go with the standalone universal print here. License can be purchased via Microsoft Admin Portal. Here we need a per user license along with add-on for a specific number of print jobs. Let’s have a costing overview here.
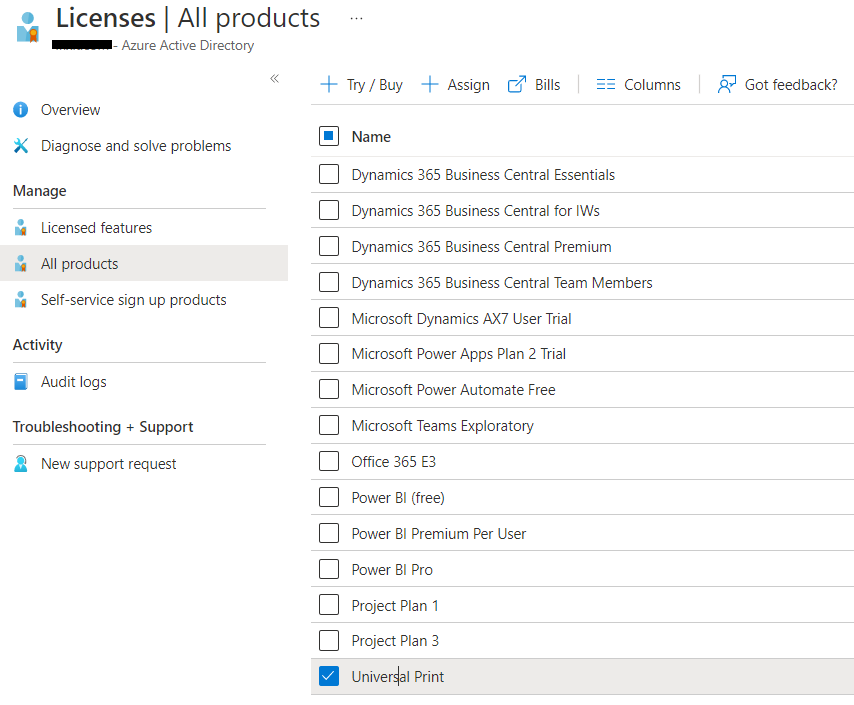
Once license is purchased, go to Azure Active Directory → Licenses → All products, select license and assign to a specific user. User must have a Global Administrator or Printer Administrator roles.
Add Printer on your network
Install the local printer driver on your computer. Printer should be on the network and should be added via IP address or name.
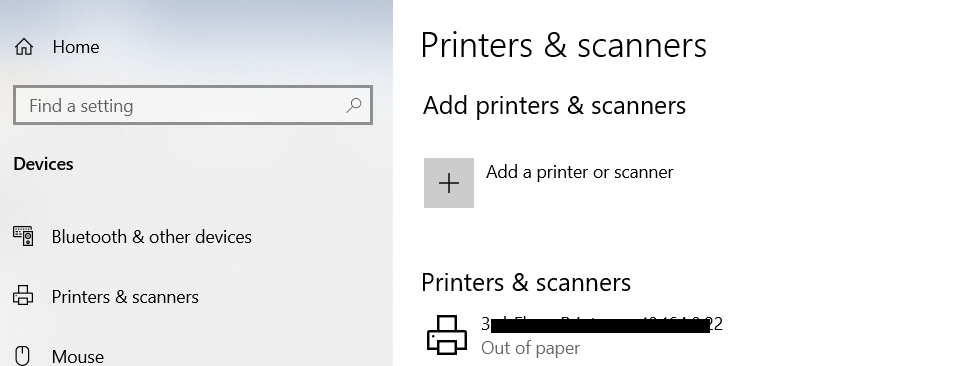
Note: Some printers may need special drivers, some may not.
Setup Universal Print
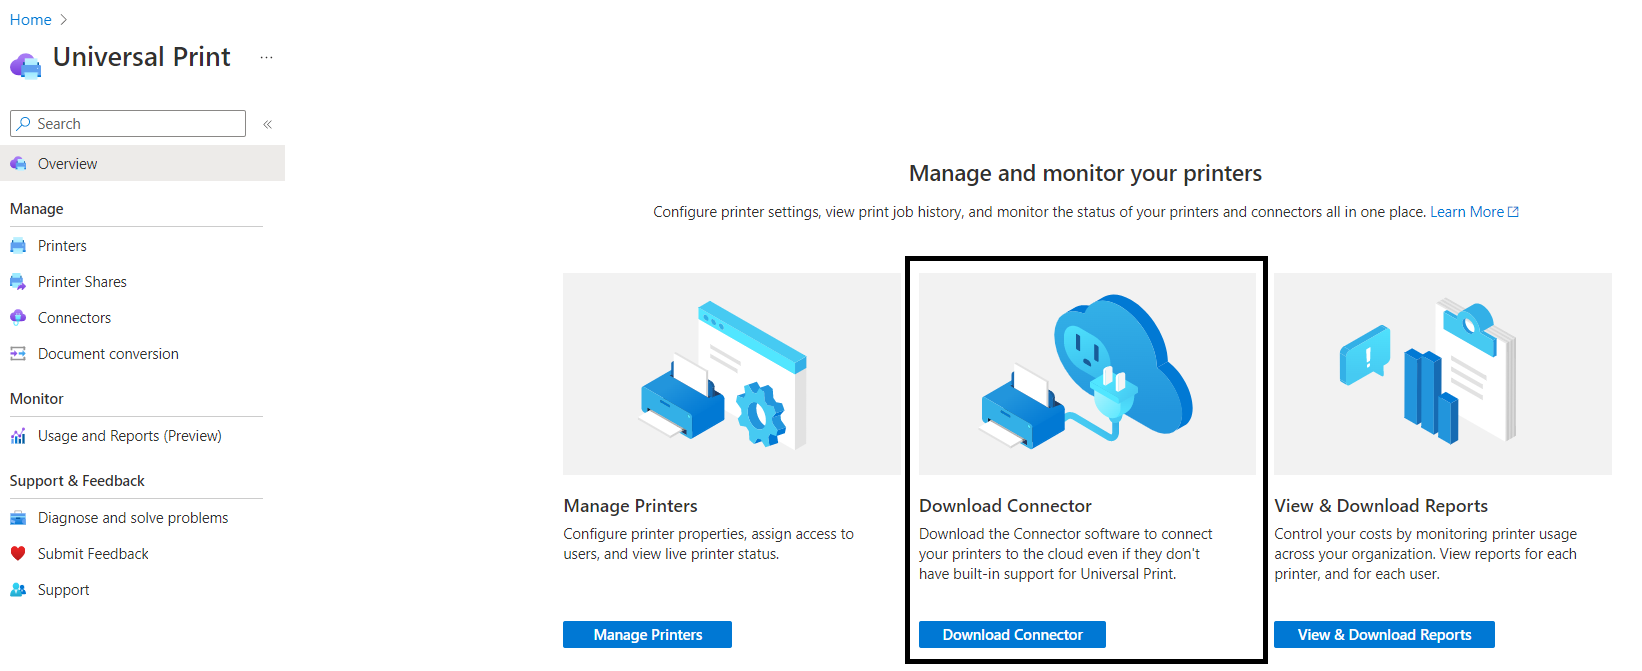
Step 1 – Install Connector
Go to Universal Print and Install connector for universal print.
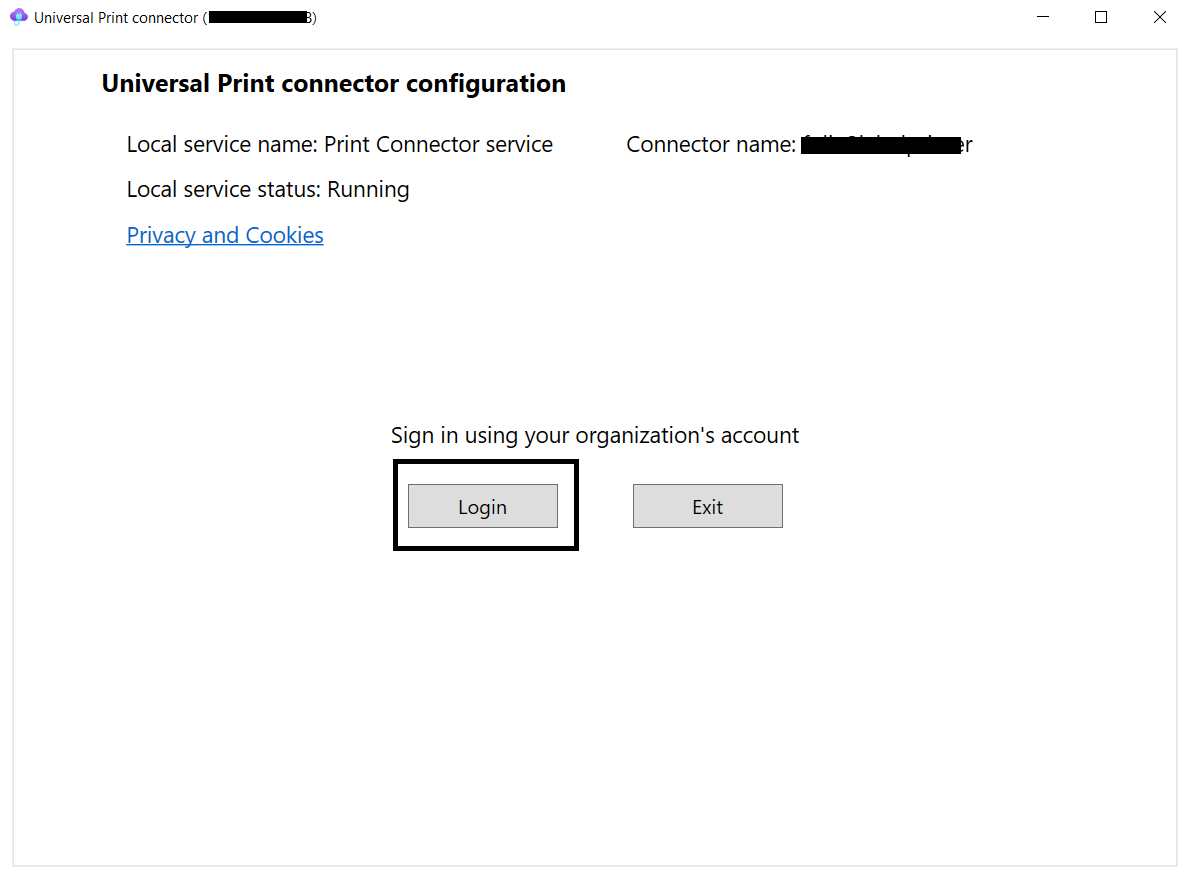
Step 2 – Login to Connector
Login to connector with the user universal print license is associated with.
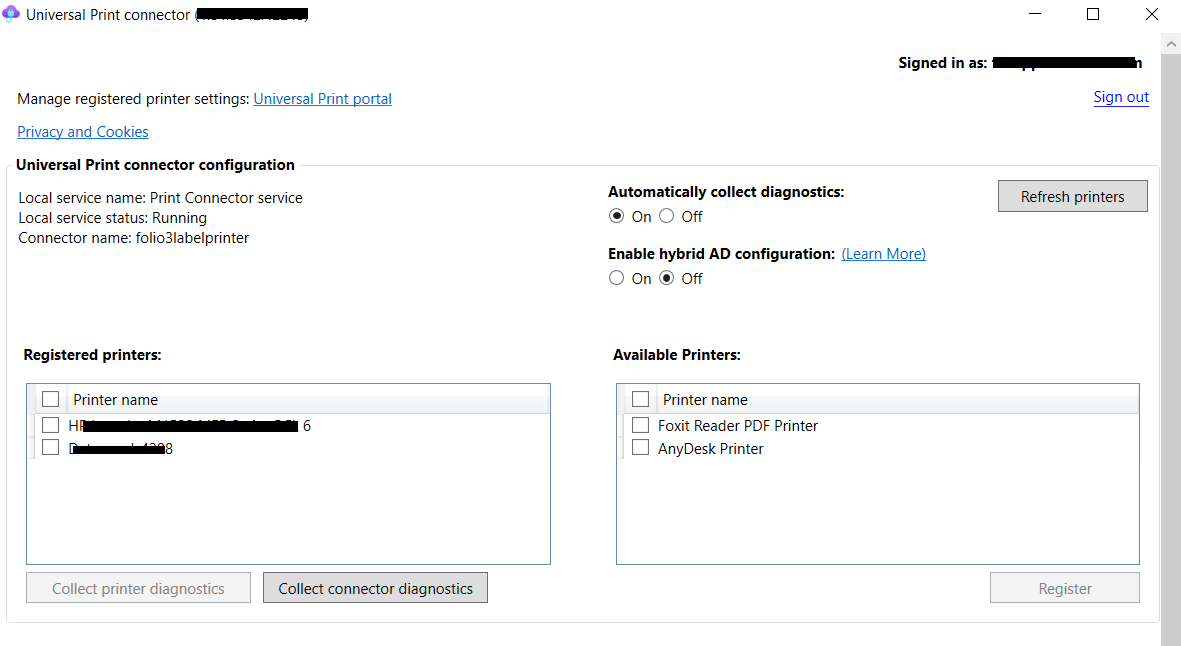
Step 3 – Register Printer
Register printer. If the printer driver is installed (when needed), a printer is added on your machine, then the printer should be listed in ‘Available Printers:’ section. Select your printer from the list and click on the ‘Register’ button.
Once the process is done, you must be able to view the printer in the ‘Registered Printers:’ section.
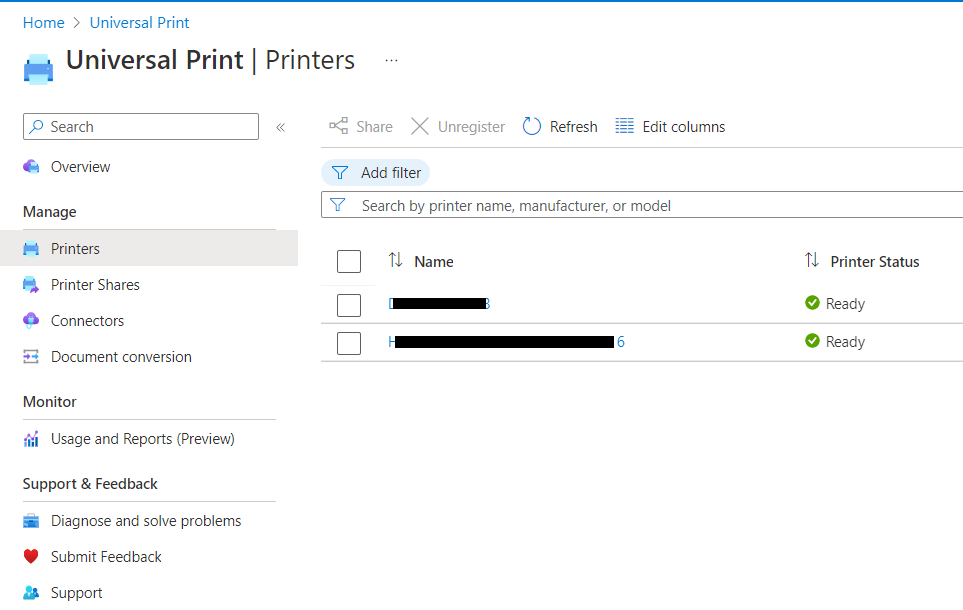
Step 4 – Check Printer
Go to the Universal Print on Azure. Check the ‘Printers’ page. Registered printers must be listed.
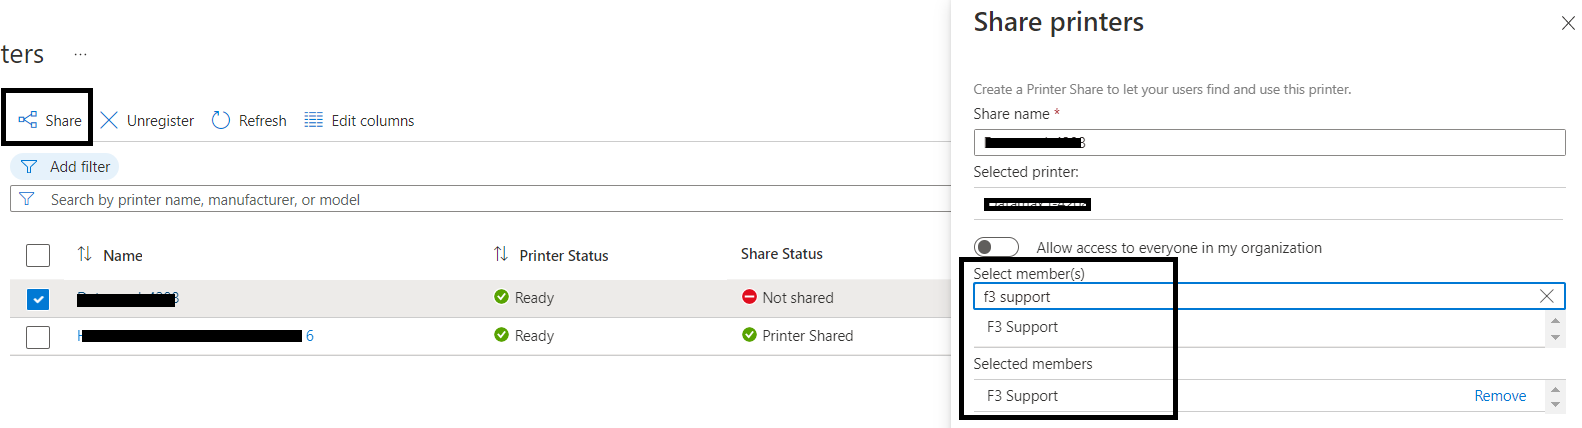
Step 5 – Share Printer
Printer must be on sharing. Select your printer and click on the ‘Share’ button. Select active directory user(s) for sharing your printer.
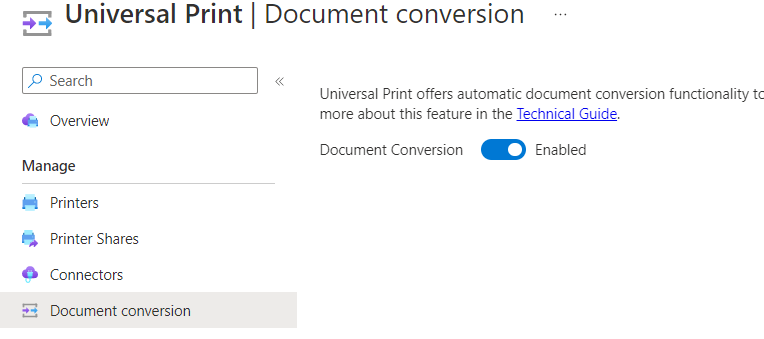
Step 6 – Conversion
Enable Document conversion.
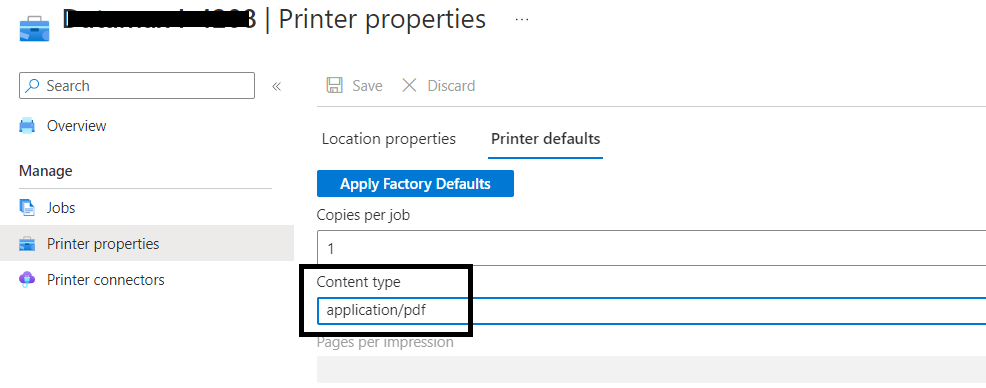
Step 7 – Set Content Type
Click on printer name, go to ‘Printer properties’ and set Content type as application/pdf
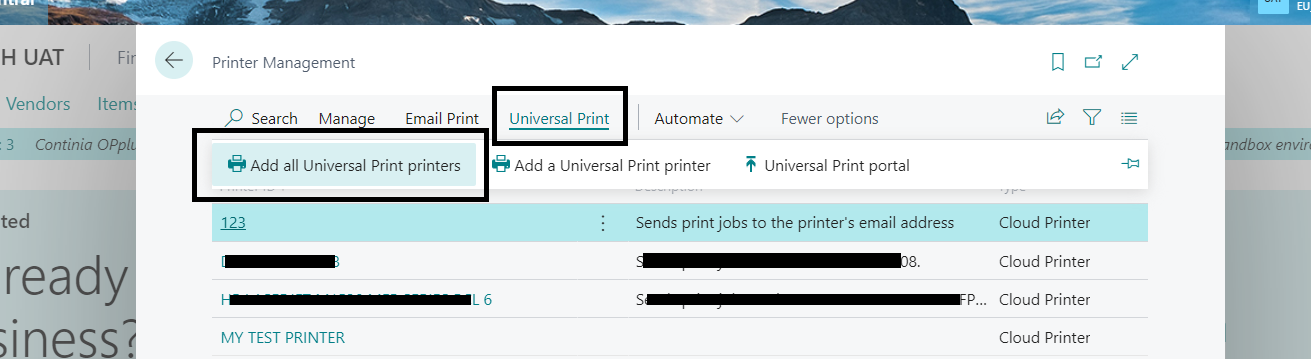
Step 8 – Add Universal Print in Business Central
Go to ‘Printer Management’ and ‘Add all Universal Print Printer’
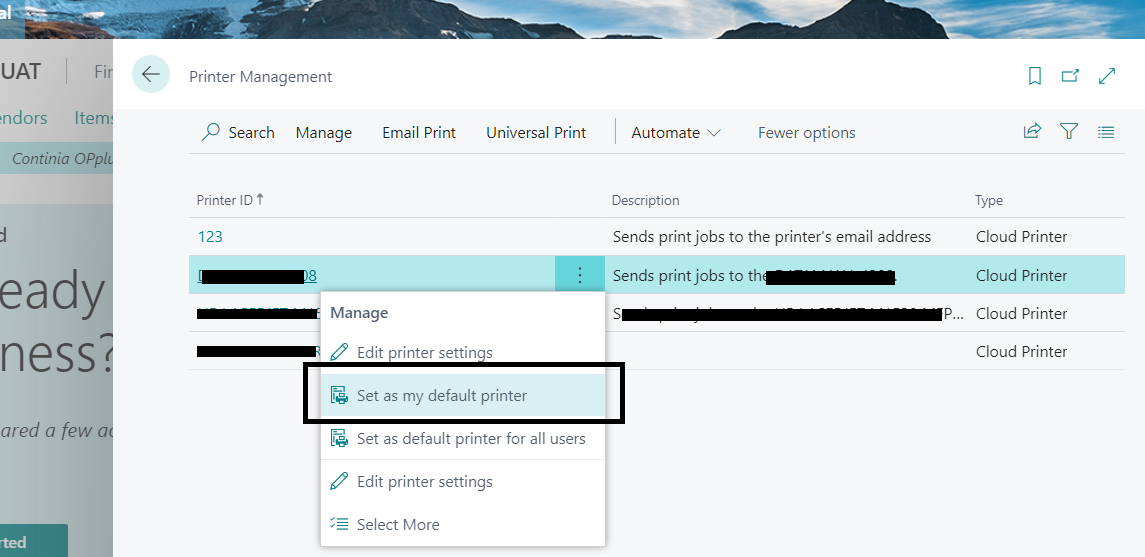
Step 9 – Set Your Printer as Default Printer
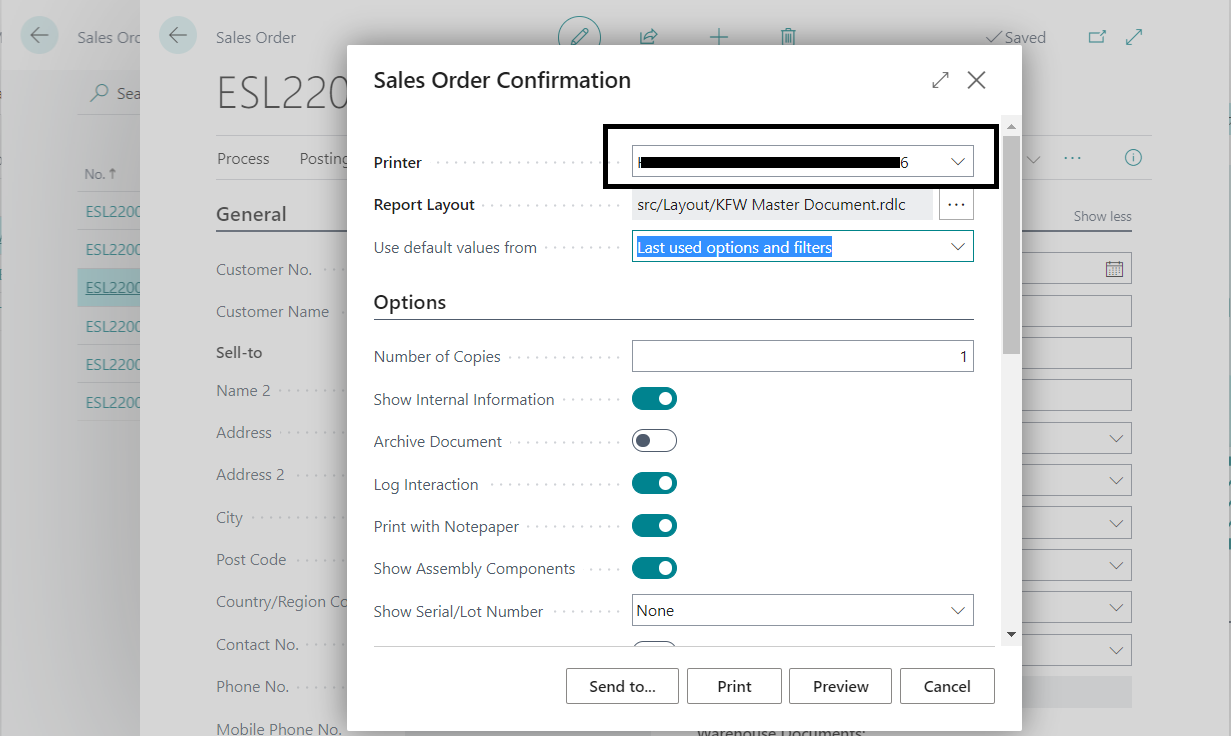
Step 10 – Test Print
Send any document for test print. Make sure that your universal print printer is already selected by the print window.
References
- What is Universal Print
- License Universal Print
- Setup Universal Print
- Tutorial