- Sign in to Microsoft Lifecycle Services (LCS).
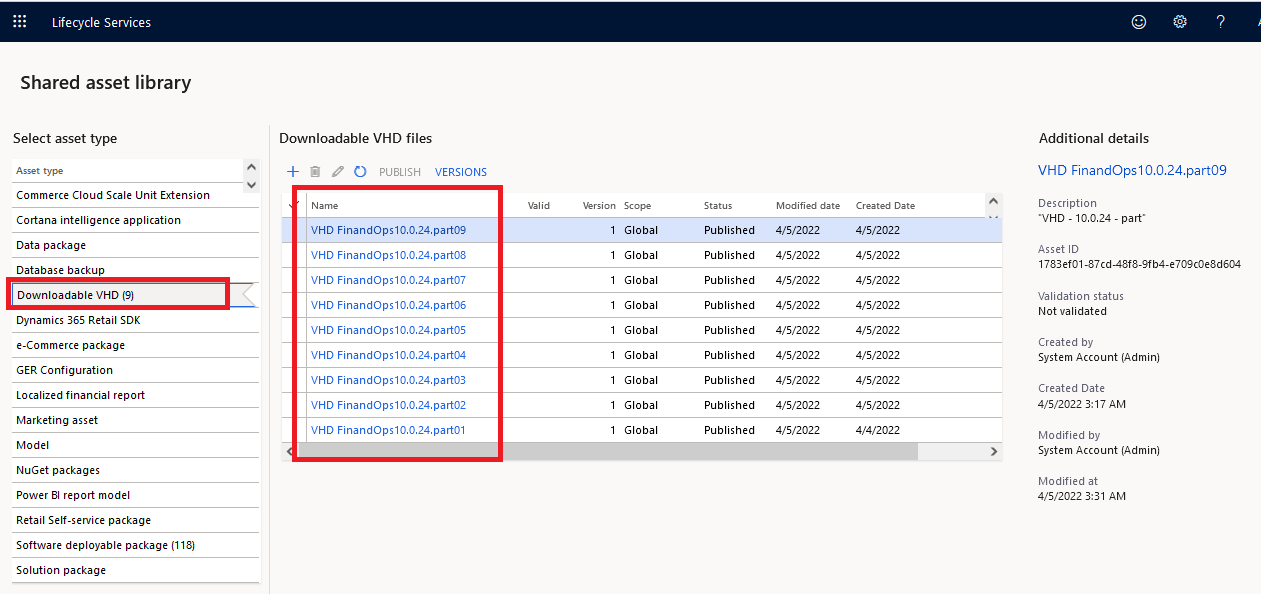
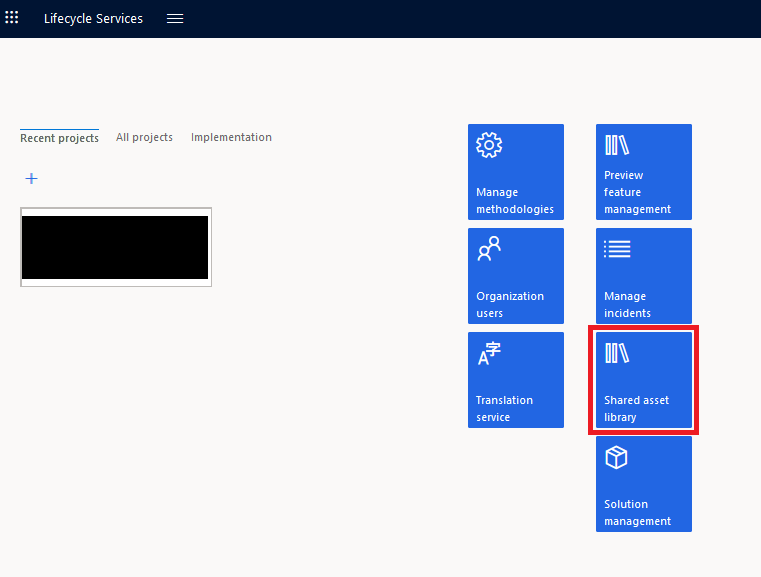
- Click ‘Shared Asset Library’.

- Click on ‘Downloadable VHD’.
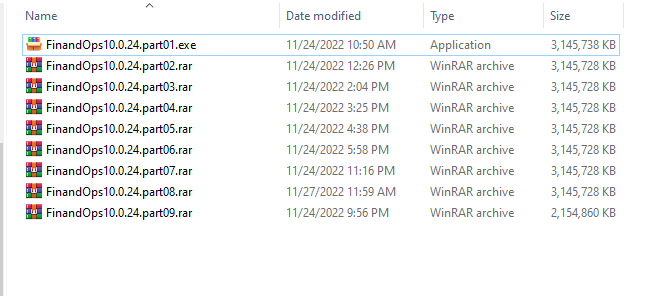
- Download all the parts of the latest version on your local machine.
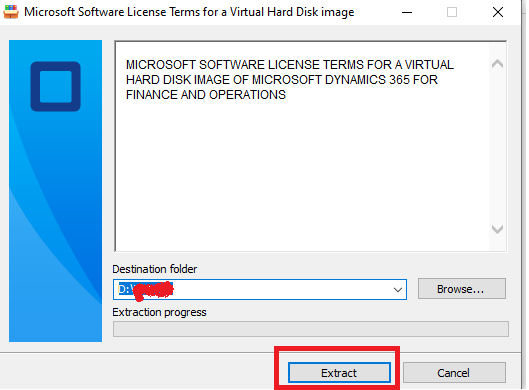
- Execute the ‘.exe’ (Part 01).
- Set the destination path where you want to extract the VHD.
- You would need at least 300 GB of free space in a single hard disk partition.
| Suggestion:
● Dedicate a complete hard disk partition of a minimum of 300 GB for the VM. |
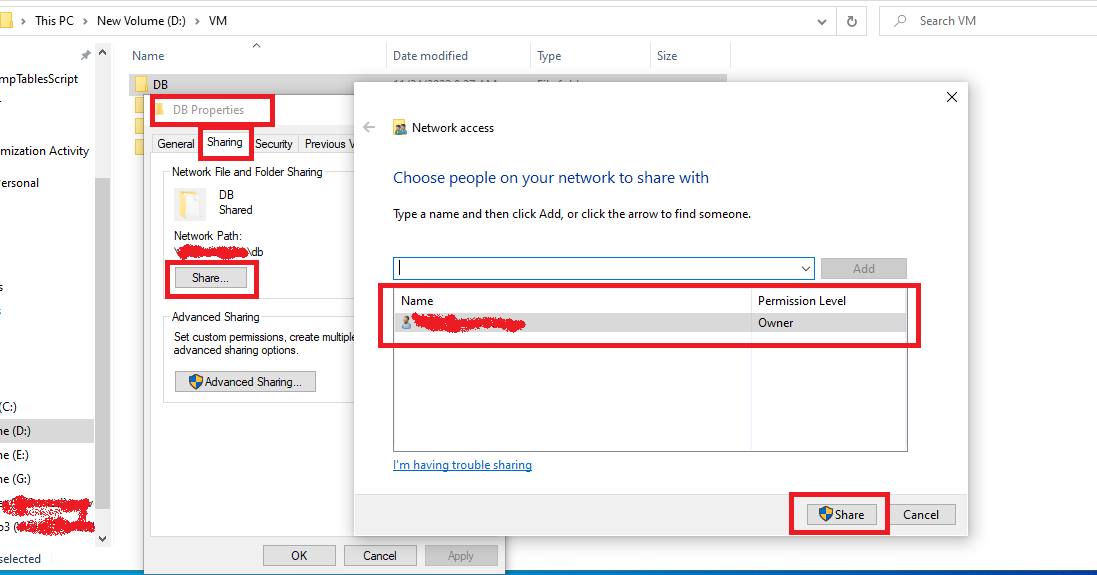
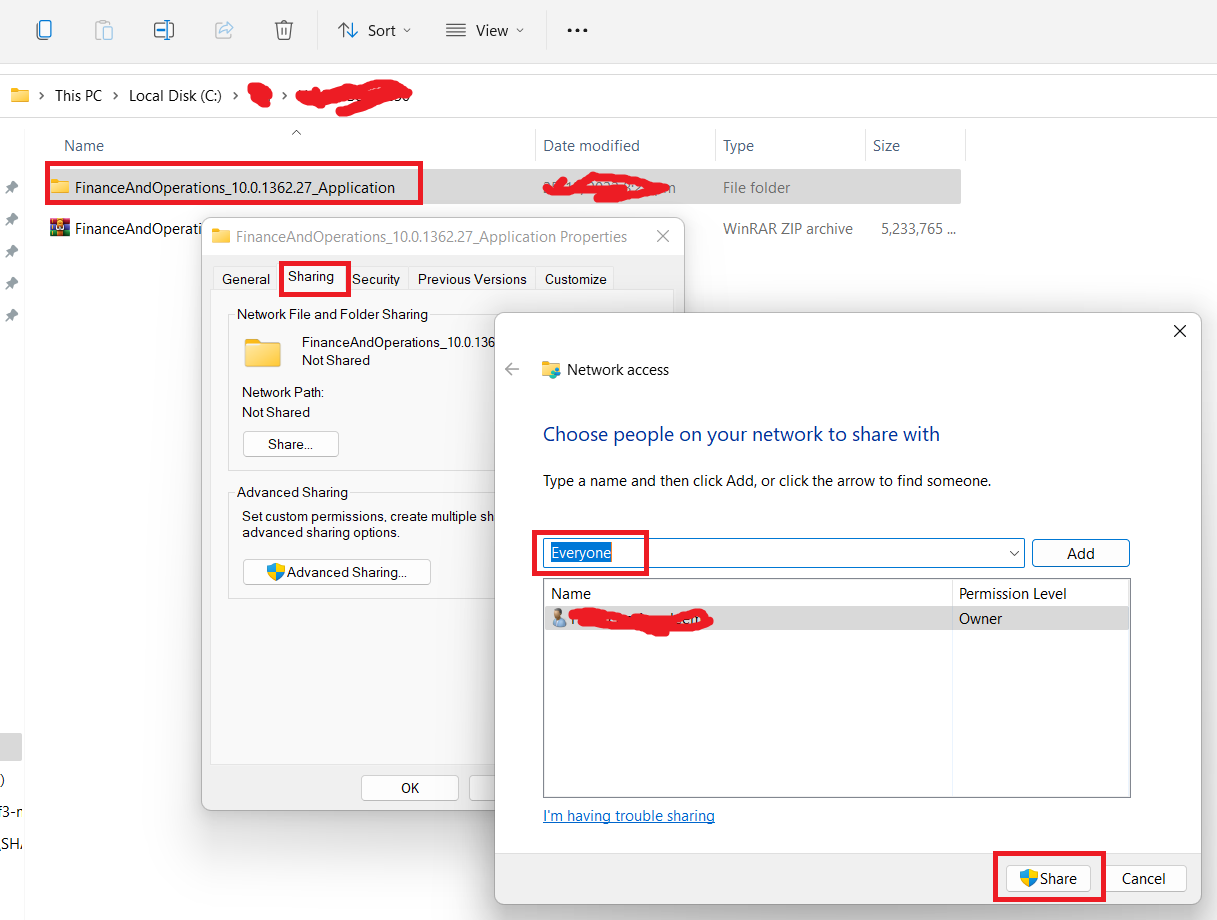
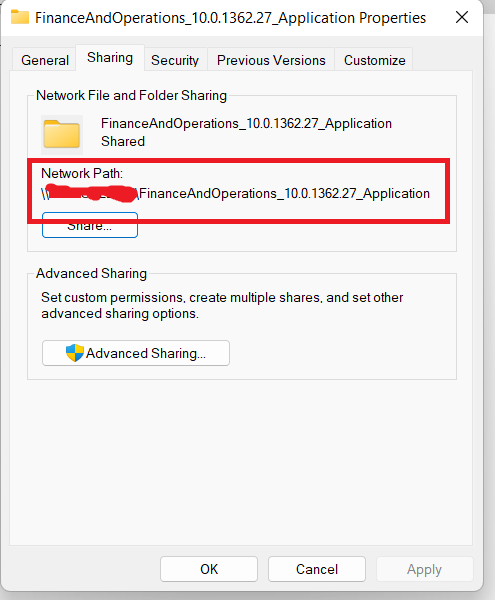
- Move or download the backup of SQL DB in a folder and share it with maximum permission level.
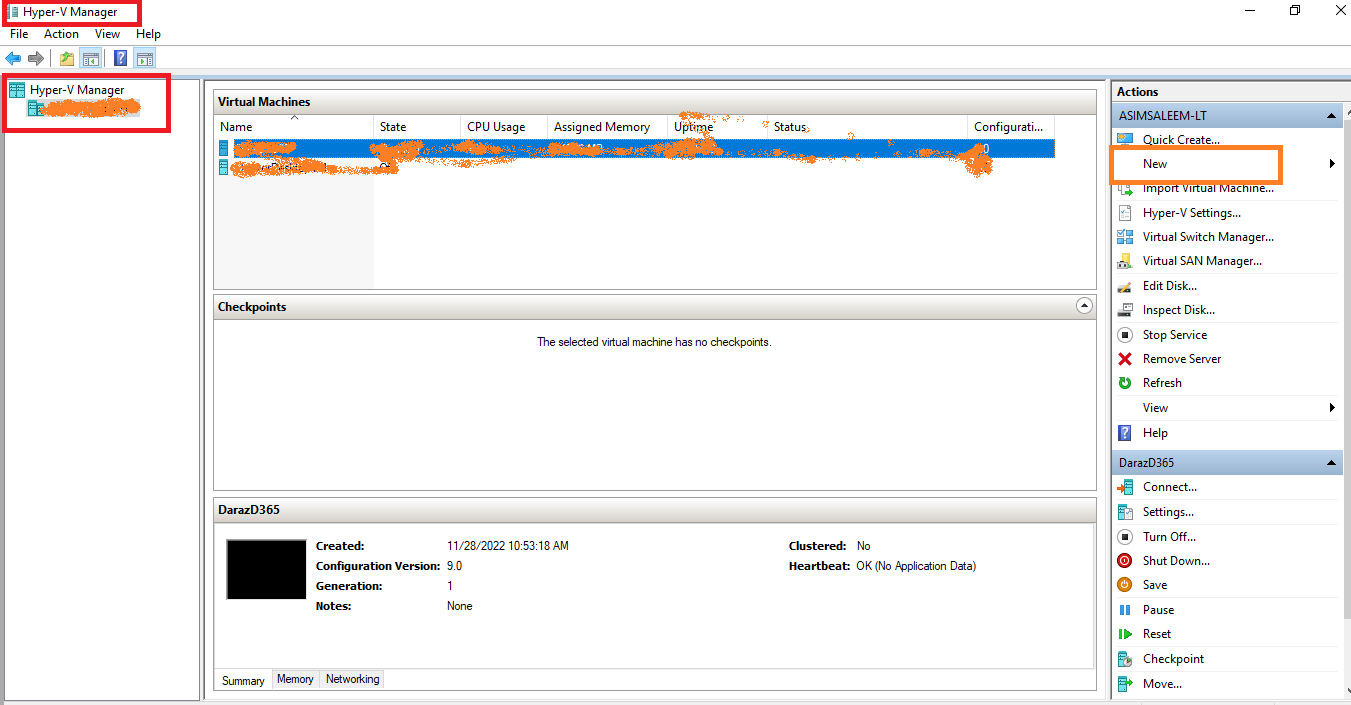
- Open ‘Hyper-V Manager’ by typing in the windows search bar.

- Click ‘New’ on the right-side action bar.
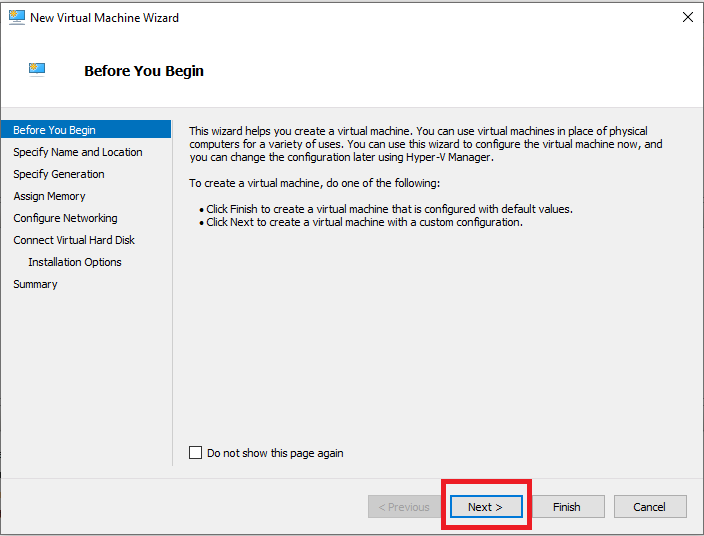
- After that, click ‘Virtual Machine’.
- Click ‘Next’.
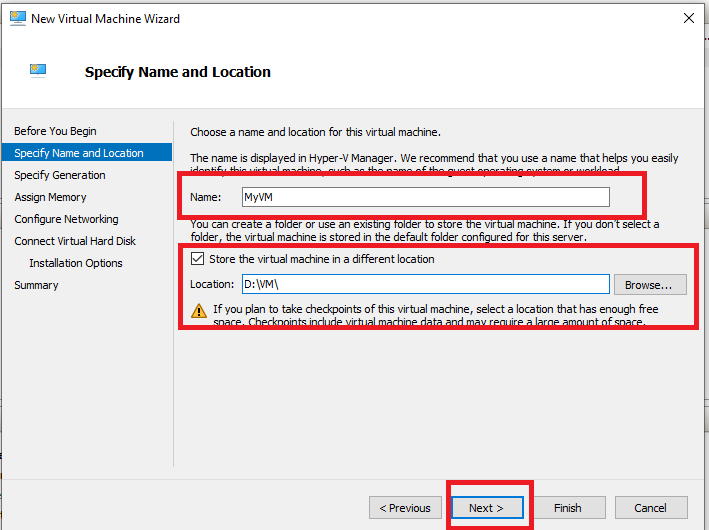
- Specify the name of the VM
- Set the location of the VM.
- Click ‘Next’.
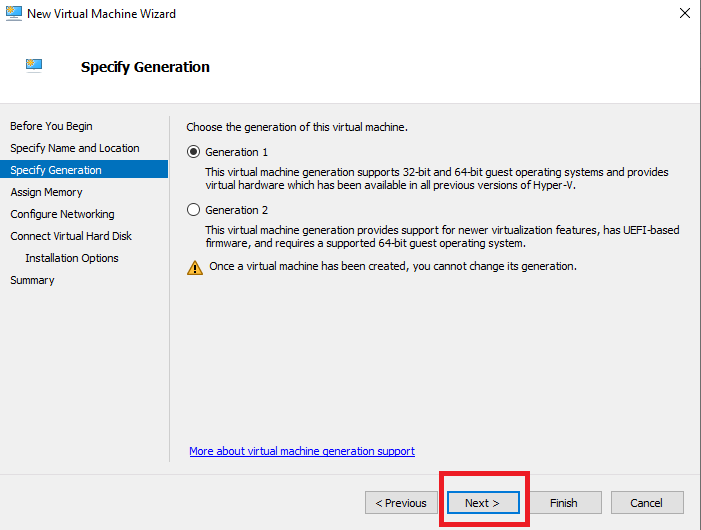
- Click ‘Next’.
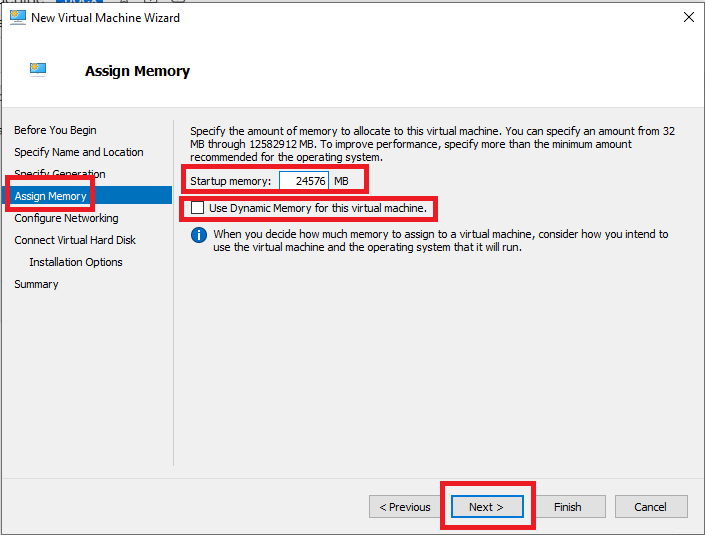
- Allocate at least 24 GB RAM to the VM to ensure it runs smoothly.
- Uncheck ‘Use Dynamic Memory’.
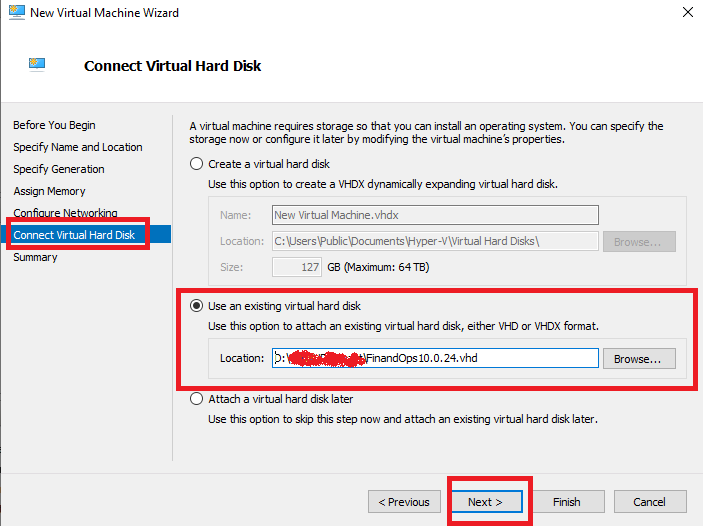
- Select ‘Use an existing virtual hard disk´.
- Set the path of the extracted VHD file from that step
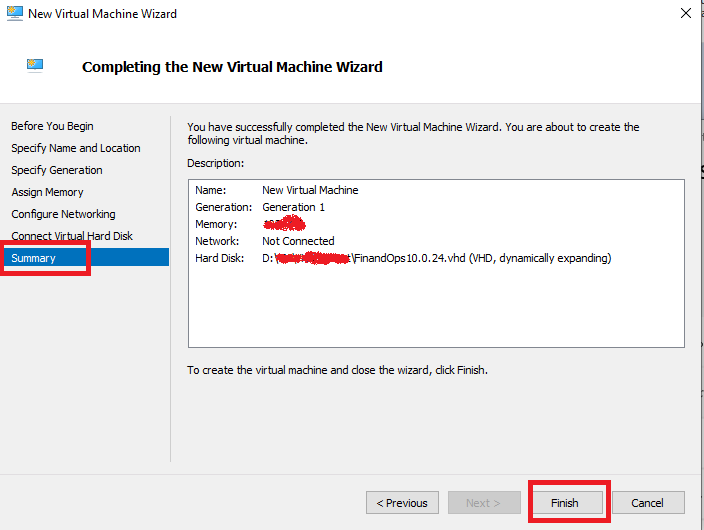
- Select ‘Finish’.
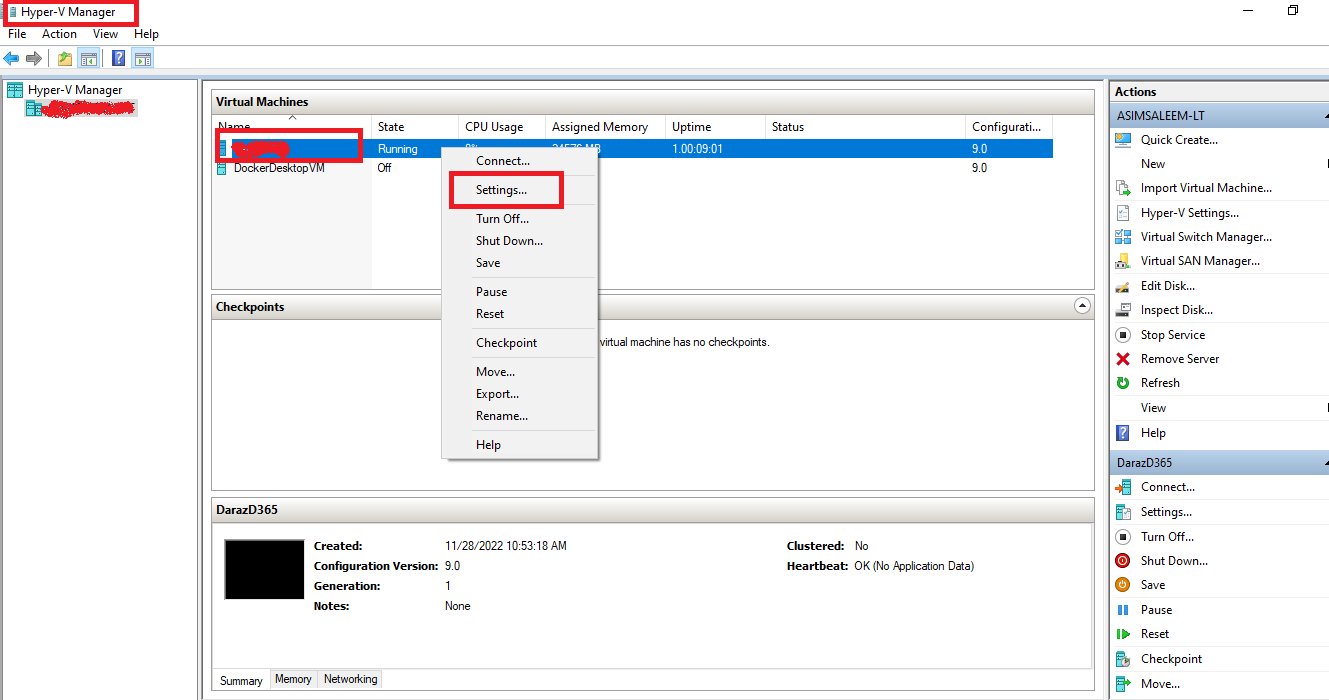
- Right-click on the newly created VM and select ‘Settings’.
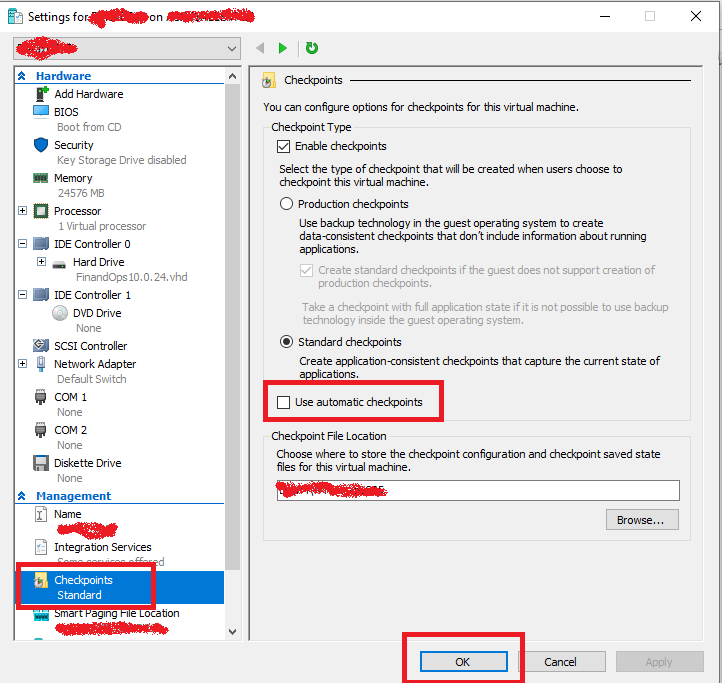
- Click on the ‘Checkpoints’ from the left bar.
- Uncheck the ‘Use Automatic Updates’.
- Sometimes the default C drive space is not sufficient. In that case, if you want to extend the space of the C partition follow the following
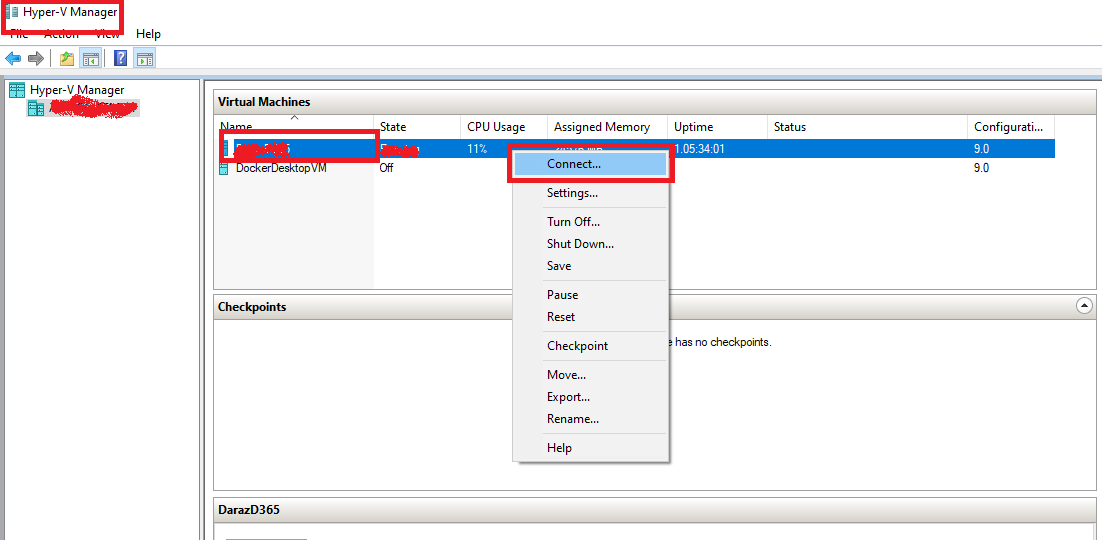
- Connect the newly created VM.
- The default password for the newly created VM is “pass@word1”.
- Check whether the VM’s windows license is expired or not. You can see the details on the VM’s desktop.

If the VM’s windows license is expired, open the command prompt as ‘administrator’. 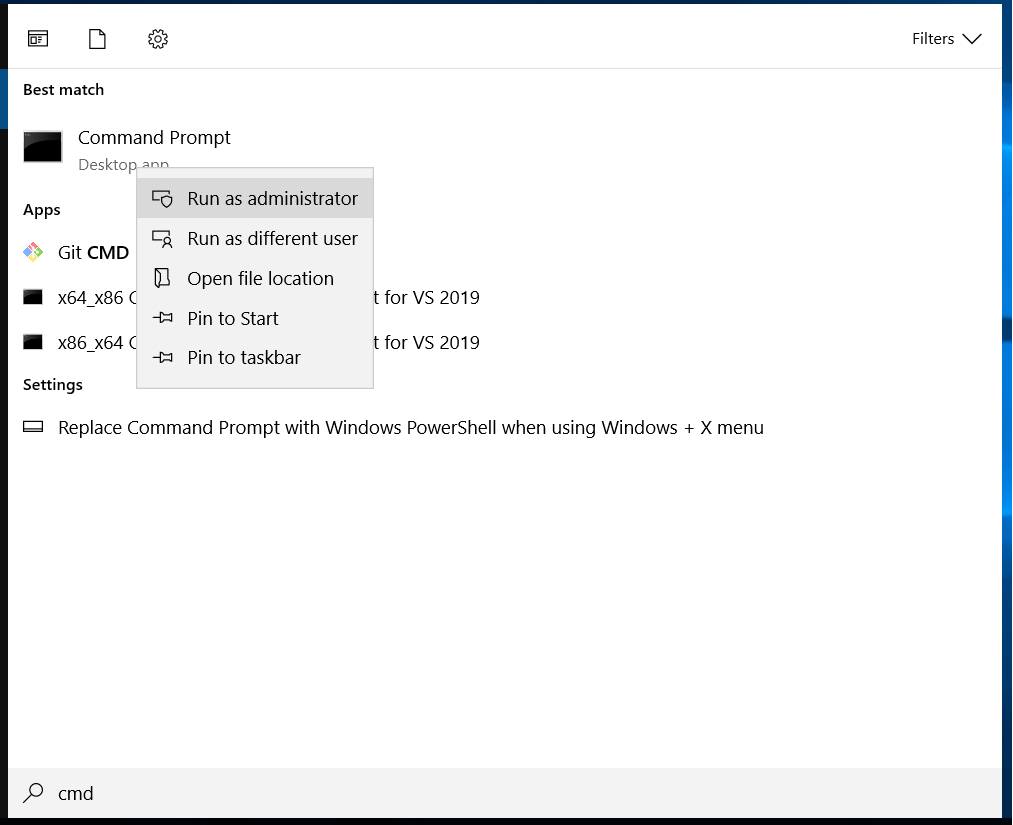
- To reset the evaluation period, type ‘slmgr –rearm’ in the command prompt and press ENTER.
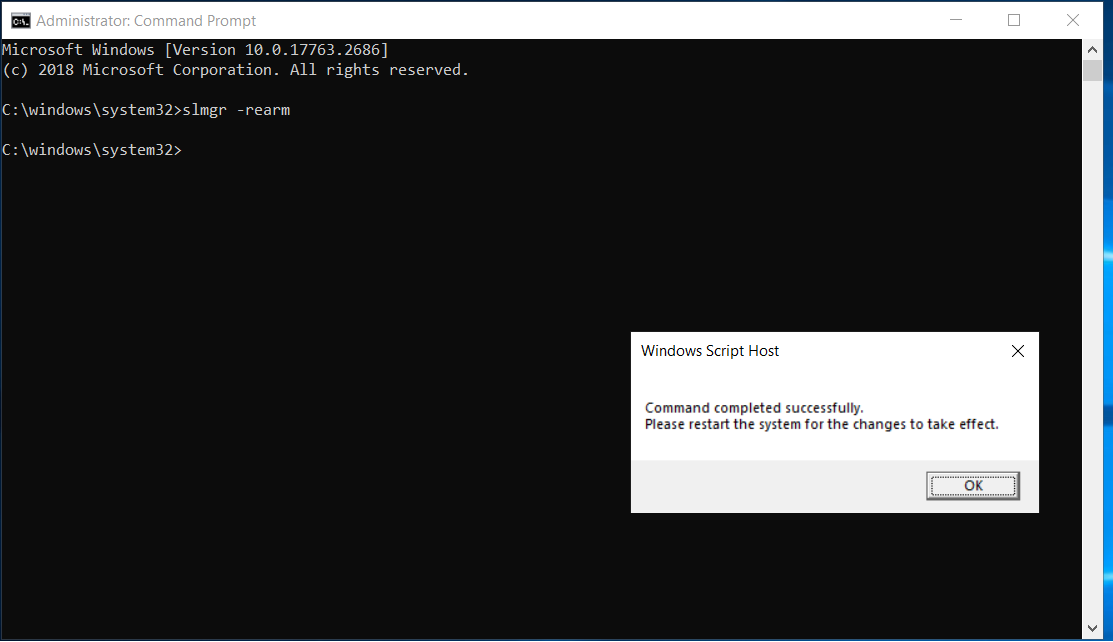
- Restart the VM.
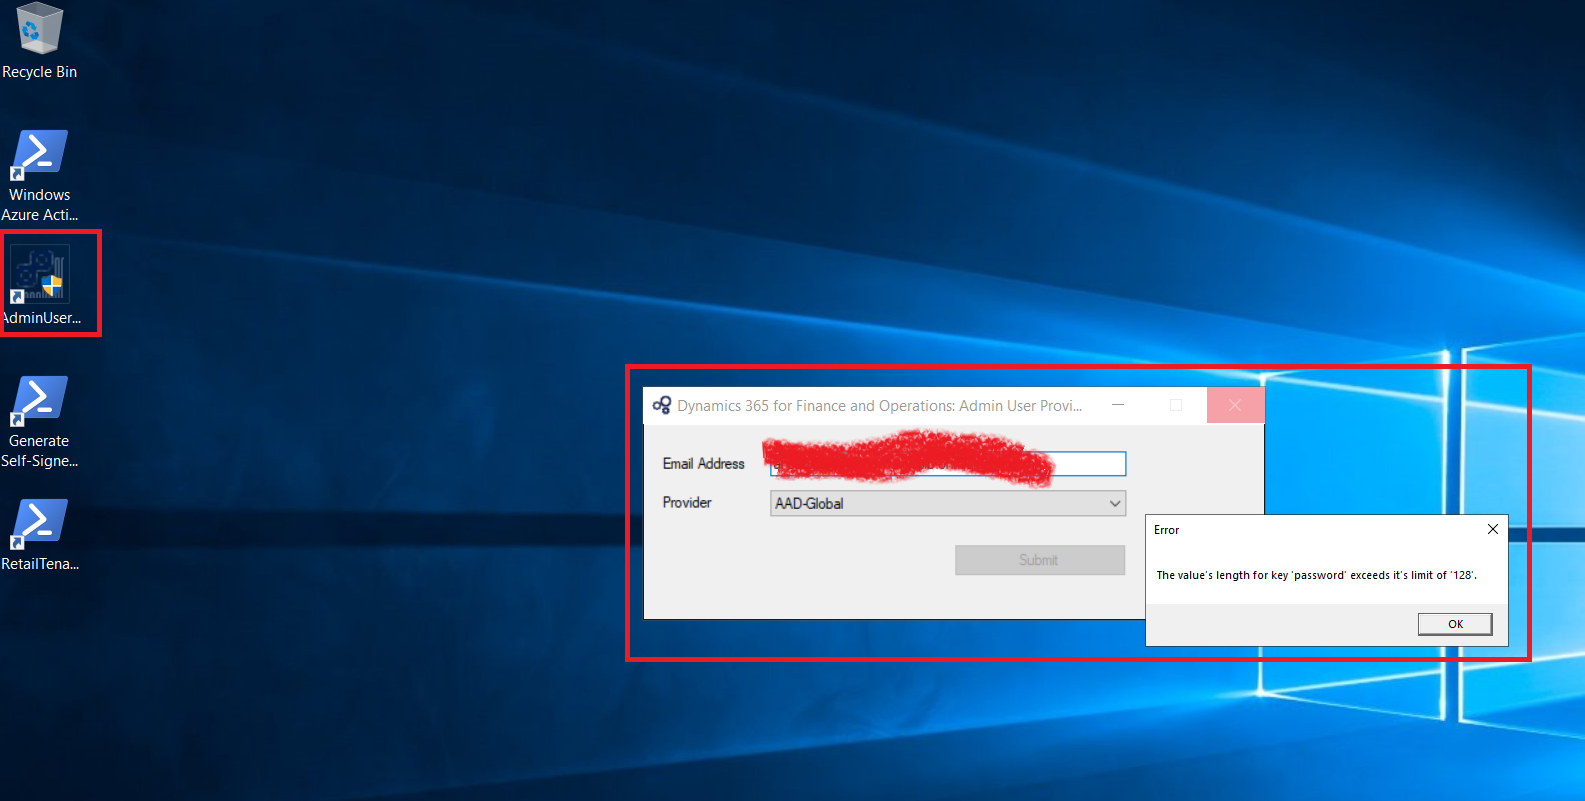
- Click on the ‘AdminUserProvisioningTool’ and enter any corporate email address. Sometimes, it throws an error i.e., ‘The value’s length for key ‘password’ exceeds it’s limit of 128’.
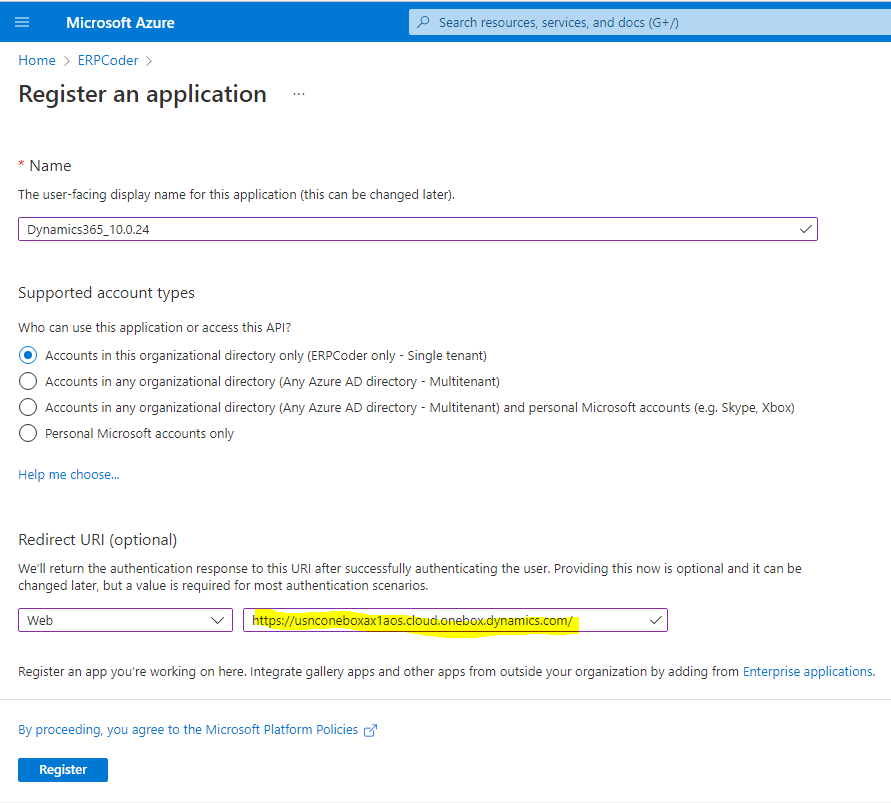
- To resolve the above error, Go to https://portal.azure.com > Active Directory > App Registration and register a new App.
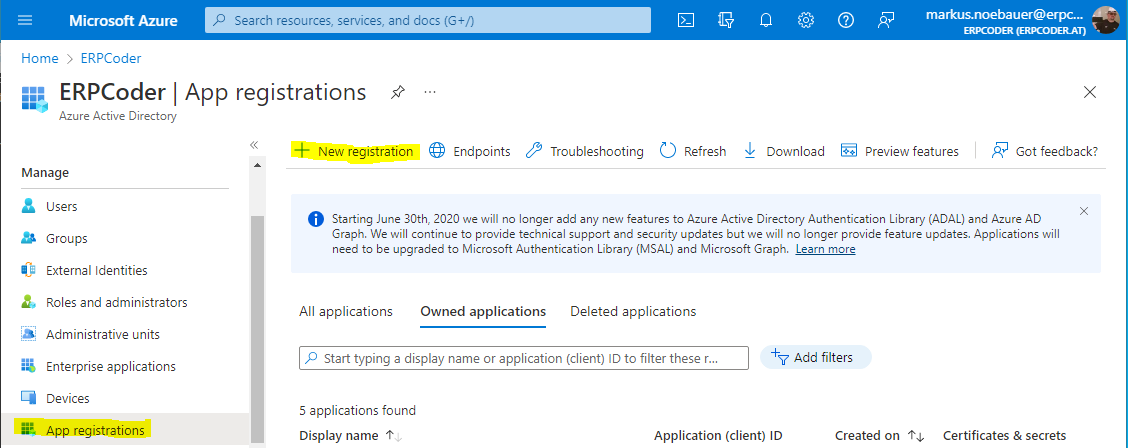
- Register a new application in Azure Active Directory.
- Provide the One-Box URL as the response address.
- Copy the AppID to your clipboard.
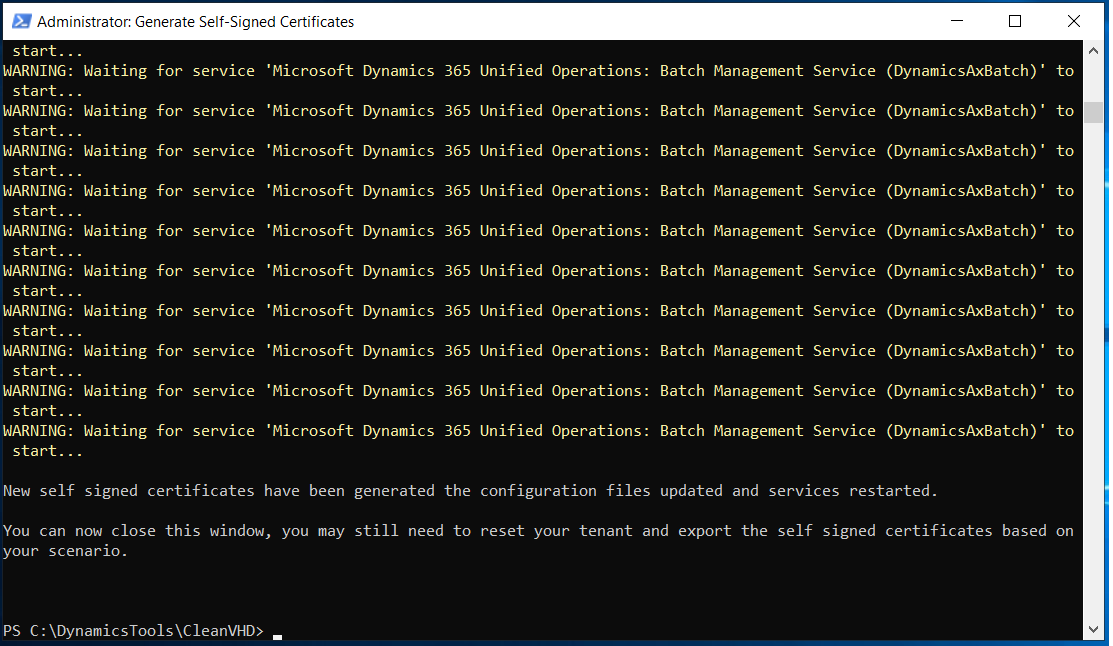
- Execute the ‘Generate Self-Signed Certificates’ PowerShell script from the Desktop of the VM.
- Provide the AppID from the App Registration and press ENTER.
- Type ‘N’ and press ENTER.
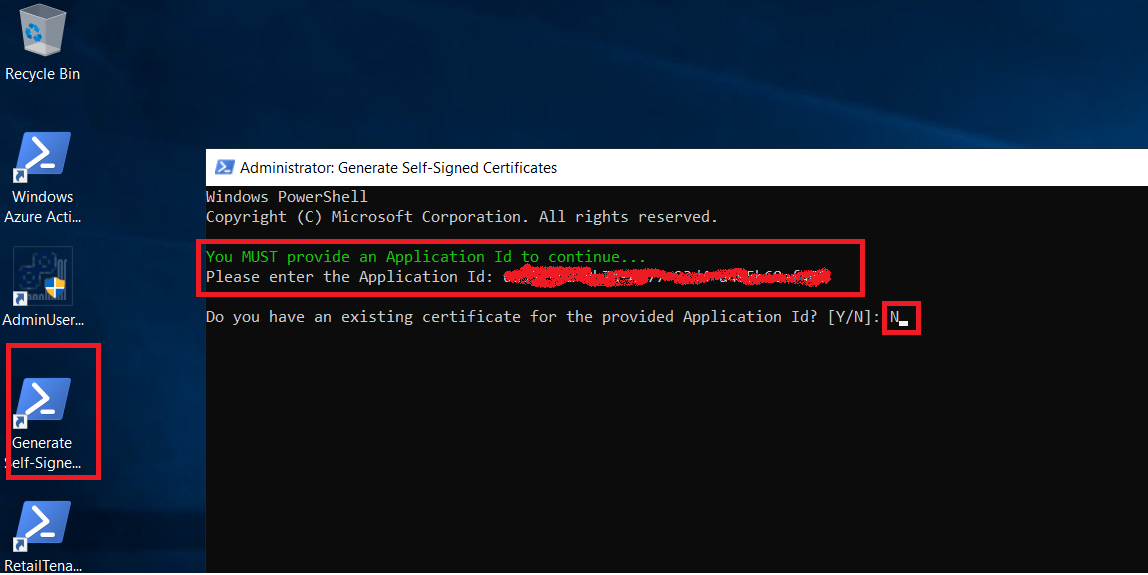
- ‘Self-Signed Certificates’ created.
- Now again Click on the ‘AdminUserProvisioningTool’ and enter any corporate email address.

- Now login to D365 with the same email address which was set in‘AdminUserProvisioningTool’.
- Link = https://usnconeboxax1aos.cloud.onebox.dynamics.com
Service Update:
- Microsoft releases service updates from time to time.
- To update the VM with the latest service, Sign in to Microsoft Lifecycle Services (LCS).
- Click on ‘Shared Asset Library’.
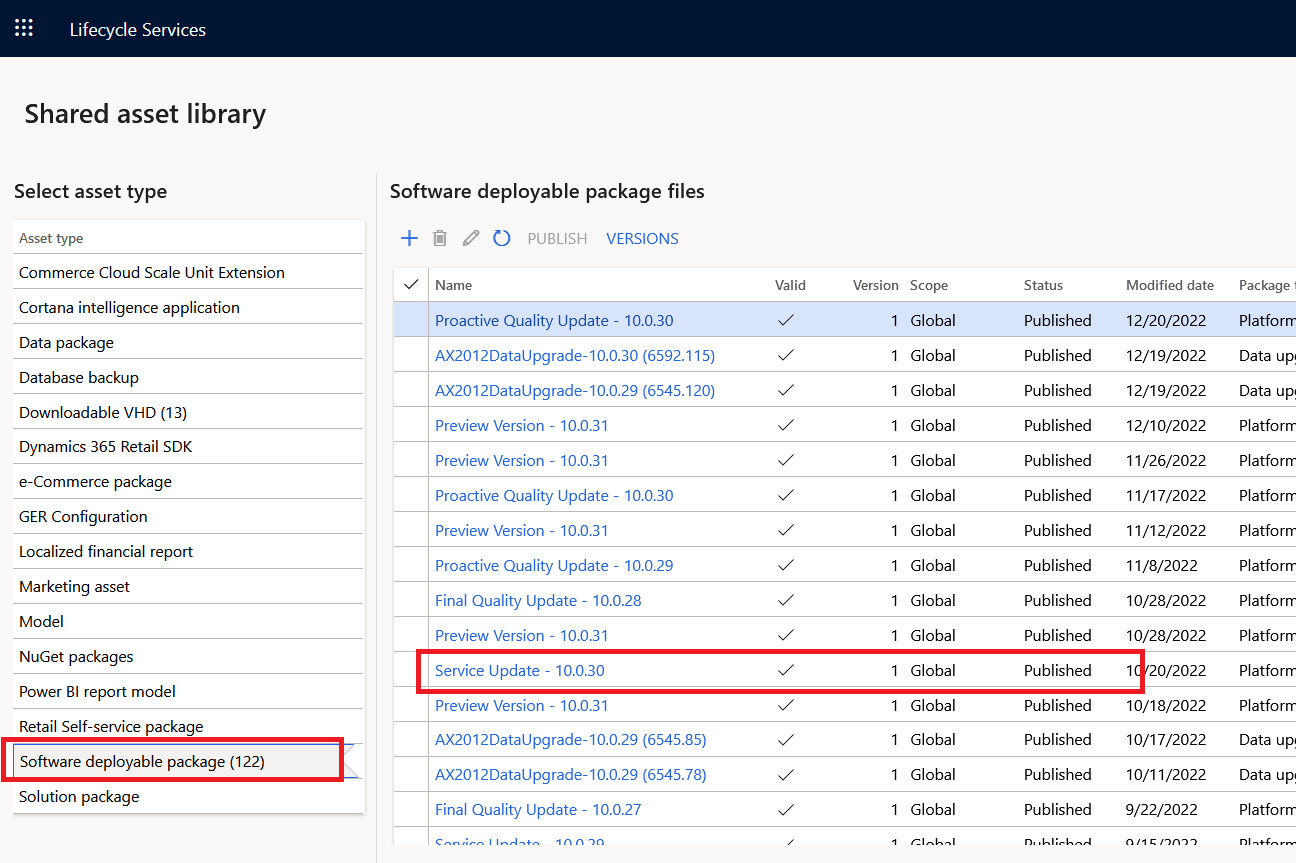
- Click on the ‘Software deployable Package’ on the left side of the screen.
- Download the latest version of the service update.
- Right-click on the downloaded zip file, Properties > General > ‘Unblock’
- Unzip the downloaded folder.
- Share the unzipped folder.
- Copy the shared file path.
- In VM, open the shared file path.
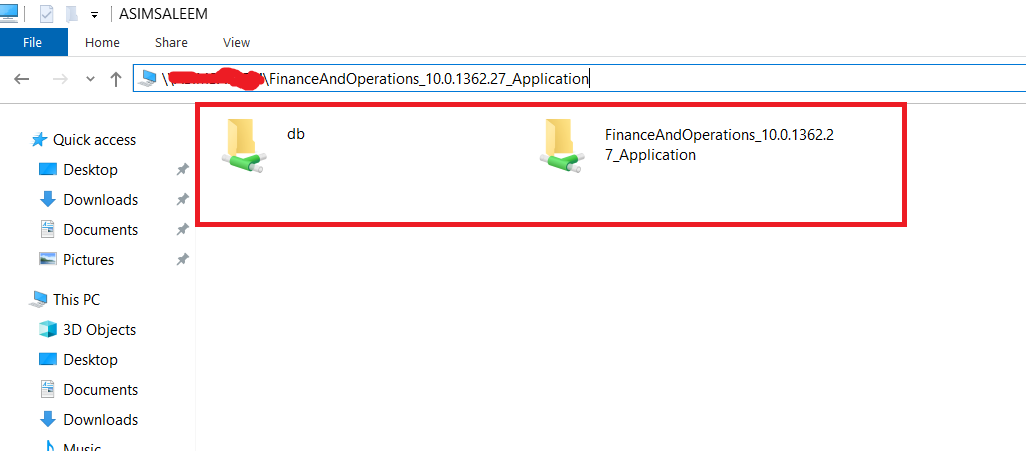
- Copy both DB & Service update folders in VM’s C Drive in new folders.
- SQL DB is shared previously at that point
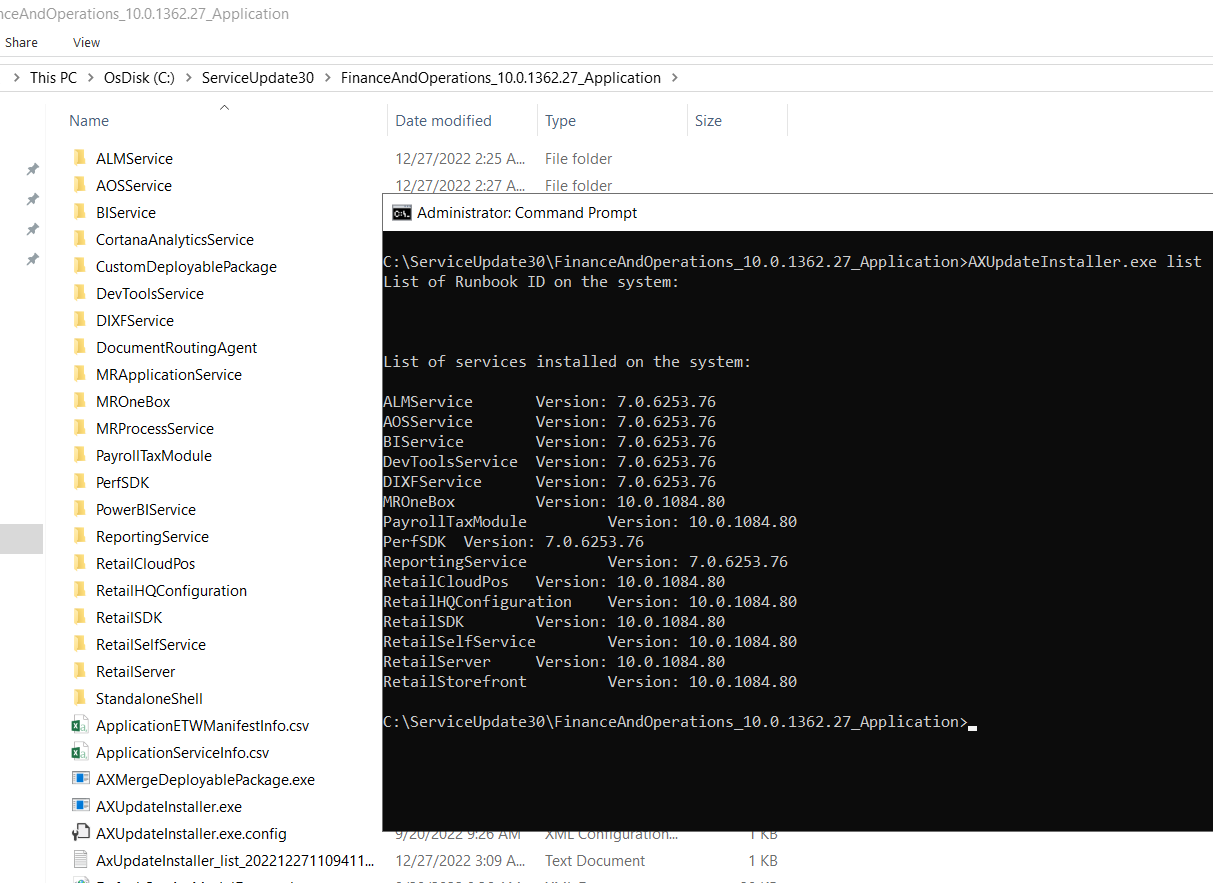
- Open ‘command prompt’ with ‘run as administrator’ from the same folder where you have copied the service update.
- Run the following command:
AXUpdateInstaller.exe list
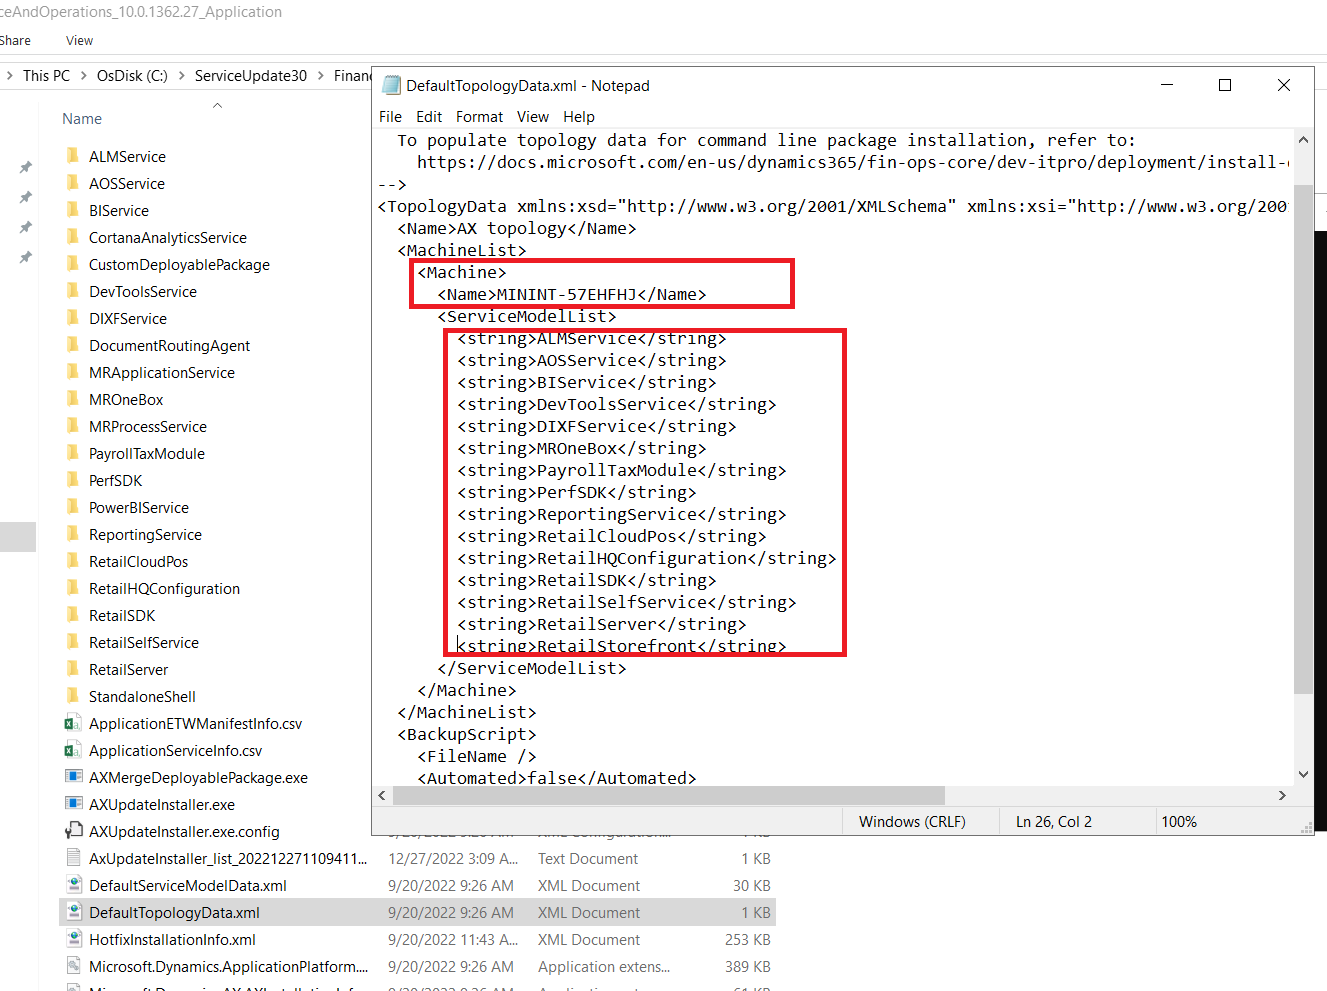
- Open the file DefaultTopologyData.xml
- Update the file DefaultTopologyData.xml with the computer name of the VM.
- (TopologyData\MachineList\Machine\Name)
- Also, update the services listed by the command above.
- (TopologyData\MachineList\Machine\ServiceModelList).
-
- Start the ‘SQL Server Reporting Service’ from the ‘Services’.
- Run the following command one by one.
- exe generate -runbookid=”PU28-runbook” -topologyfile=”DefaultTopologyData.xml” -servicemodelfile=”DefaultServiceModelData.xml” -runbookfile=”PU28-runbook.xml”
- exe import -runbookfile=”PU28-runbook.xml”
- exe execute -runbookid=”PU28-runbook”
- The third command will take some good time to complete.
| Suggestion:
Sometimes the third command throws many different errors. You can re-run that step by the following command: AXUpdateInstaller.exe execute -runbookid=”PU28-runbook” -rerunstep=1 There is a chance that any step could present a “Time-Out” error, for that you can re-run that step.
|
SQL DB Restore:
- Open the SQL Server with ‘run as administrator’.
- Restore the DB
Full Build with DB Sync
- Open the Visual Studio with ‘run as administrator’.
- Run a full build with DB Sync on your customized models.
Expand the Hard Disk space (C Drive) of VM
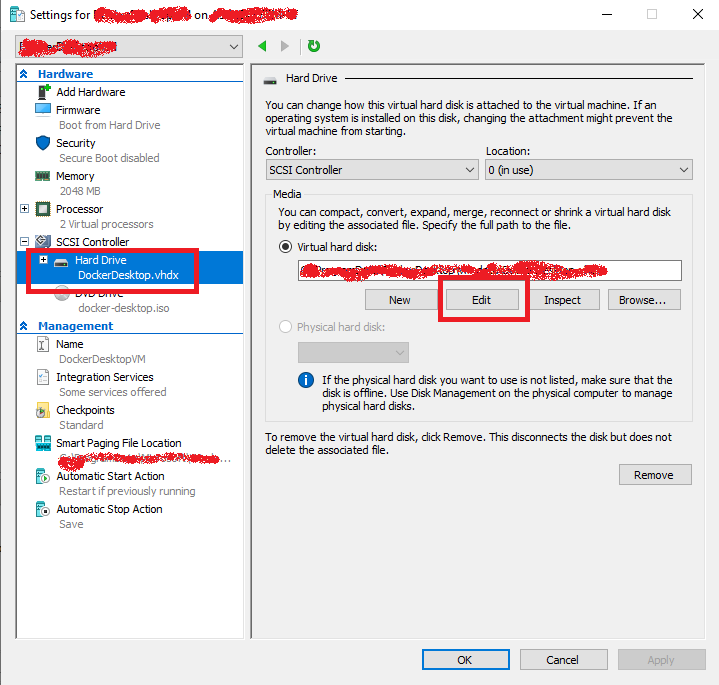
- Right-click on the VM from Hyper-V Manager and select ‘Settings’.
- Find & click on the ‘Hard Drive’ component from the left menu bar.
- Click on the ‘Edit’ button.
○ The ‘Edit’ button is only enabled when the VM is in ‘Off’ status.
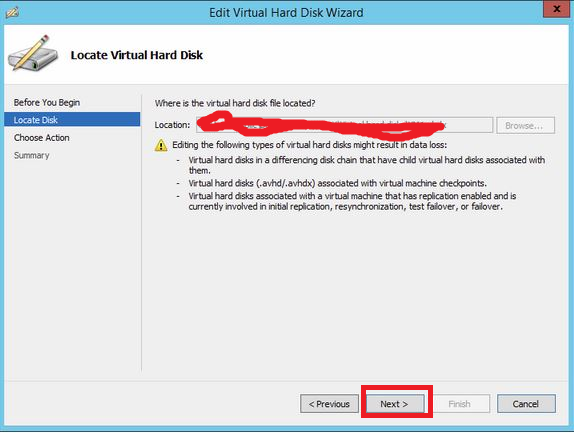
- Click ‘Next’
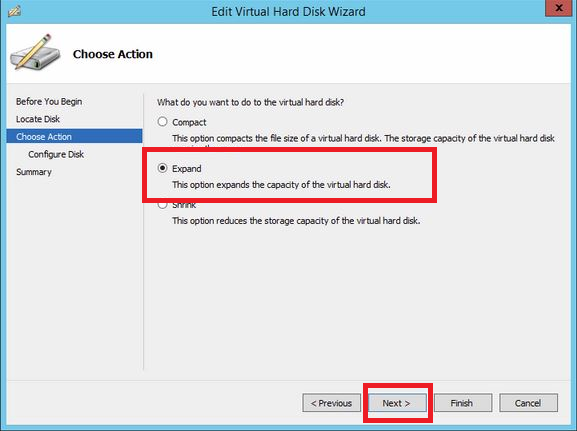
- Click on ‘Expand’ and then ‘Next’.
- Set the new Size of the HD.
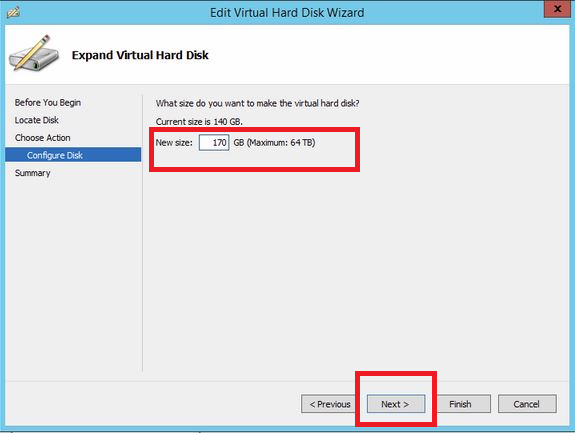
- Once the Virtual Hard disk is successfully expanded, turn on the VM following the same process previously used to turn on the VM and log in.
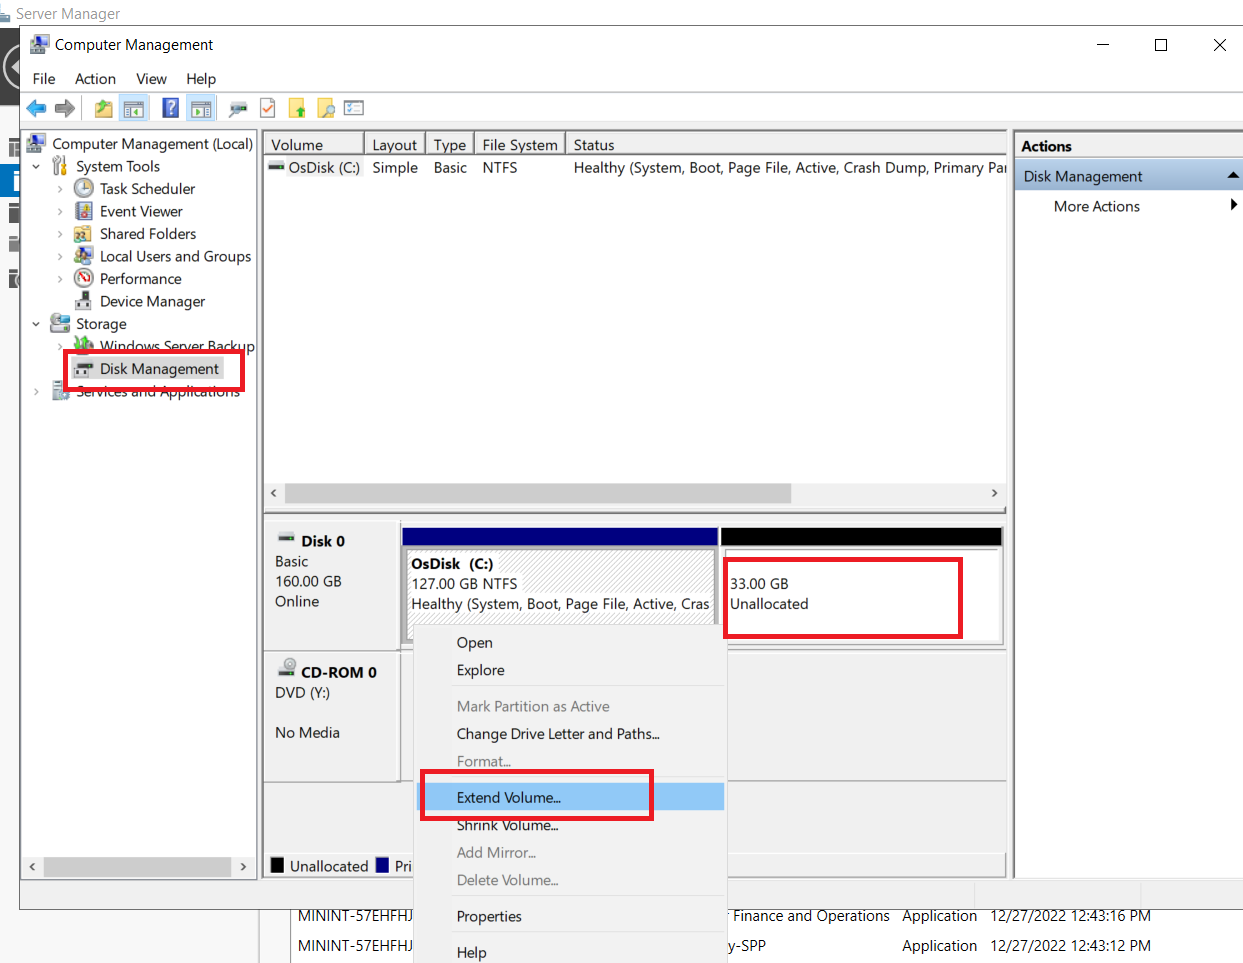
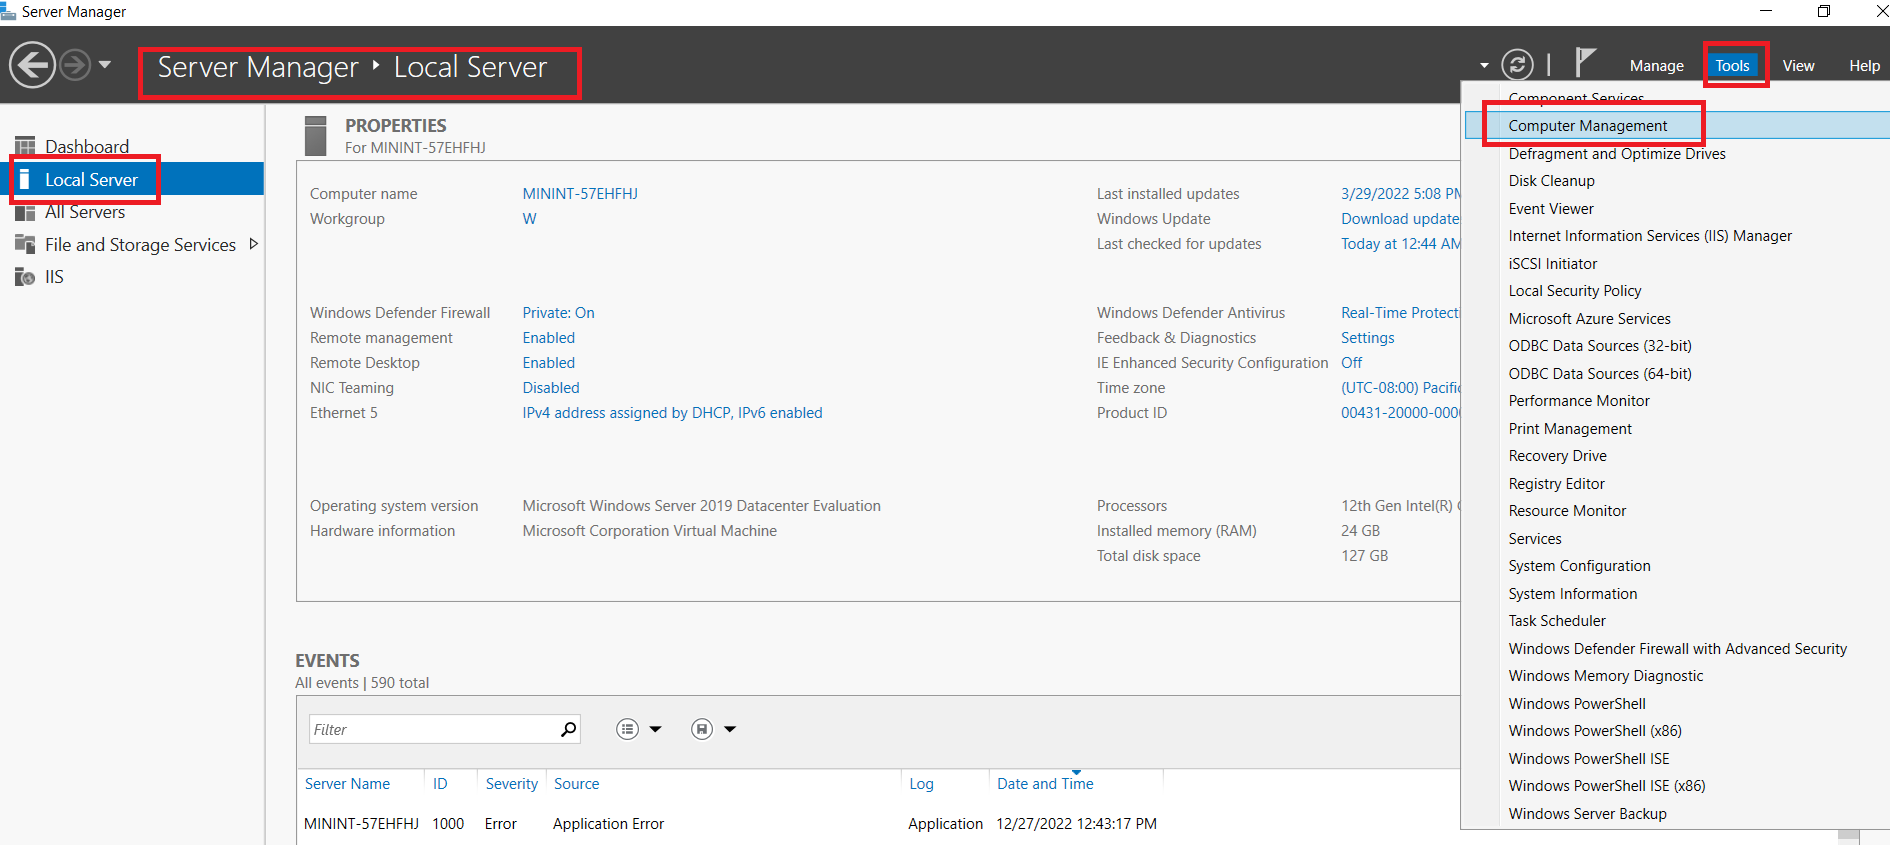
- Open Server Manager>Select Local Server>Click Tools and Select Computer Management.
- Open ‘Disk Management’ on VM. You will see your current C: Drive Partition along with an Unallocated Partition with the size of hard disk space that you have created earlier.
- Right-click on the volume you want to extend (in this case C:\ Partition) and select ‘Extend Volume’. This will open the Wizard screen for your extended volume, follow the on-screen instructions to complete the process.