Microsoft Dynamics 365 Business Central is an integrated, cloud-based business management solution for small to medium-sized enterprises (SMEs). It combines enterprise resource planning (ERP) and customer relationship management (CRM) capabilities into a single platform. Business Central is part of the larger Microsoft Dynamics 365 suite, which encompasses a range of applications for various business needs.
Business Central is highly customizable to meet specific business needs. Users can tailor the system to their requirements, and developers can create extensions to add functionality.
Workflows in Business Central
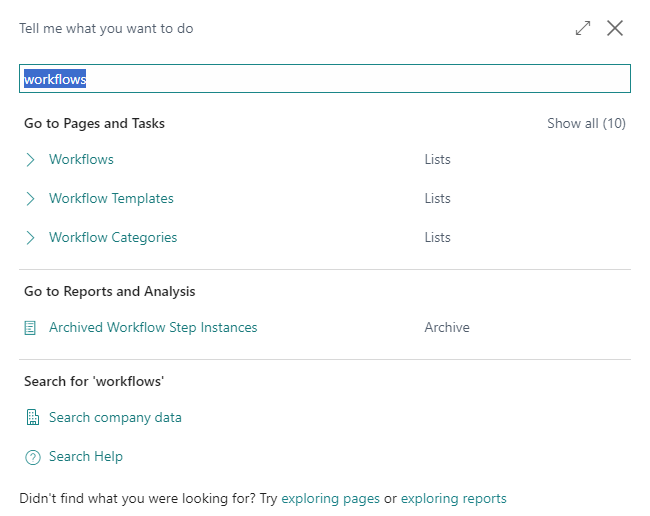
Workflows in Business Central are one of the most useful features to streamline business processes and task automation. You can create and enable workflows in Dynamics 365 Business Central by searching for workflows in the search bar or choosing from available templates. There are many templates available to create workflows for different business processes. You can take a look at it by searching for “Workflow templates” in the search bar:
Below is a list of many available templates: 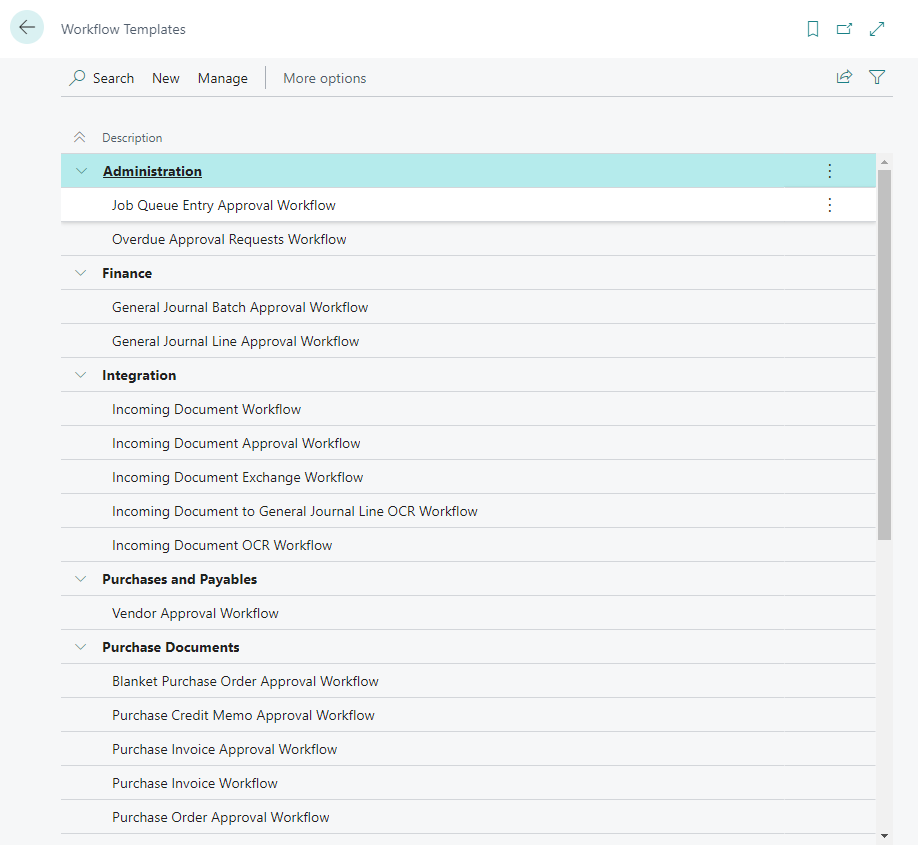
Lets create a purchase order approval workflow from available templates and understand it step by step:
- From the available templates, select “Purchase Order Approval Workflow”

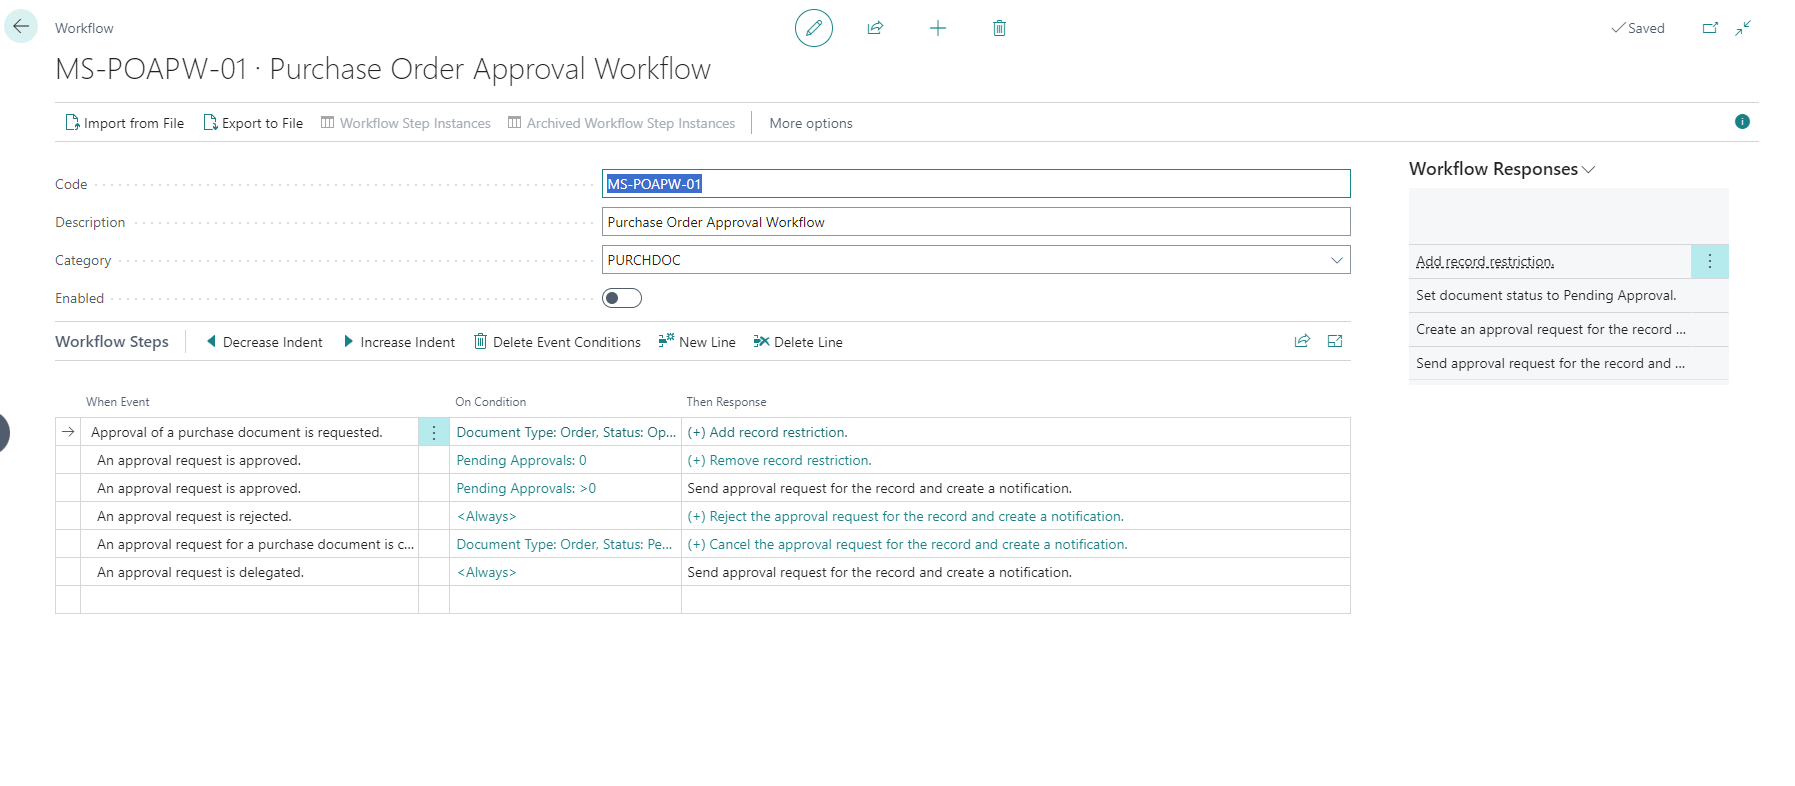
- You can update the code, description, and category as per your requirements. Once enabled, you cannot make changes to it without disabling the workflow.
- There are three important aspects of any workflow. Events, Conditions, and Responses. Let us discuss them in more detail.
Events
The workflow event that starts the workflow is called a trigger. For example:
- When a customer record is changed
- Approval of a customer is requested
You can see a list of all events by clicking against an event:

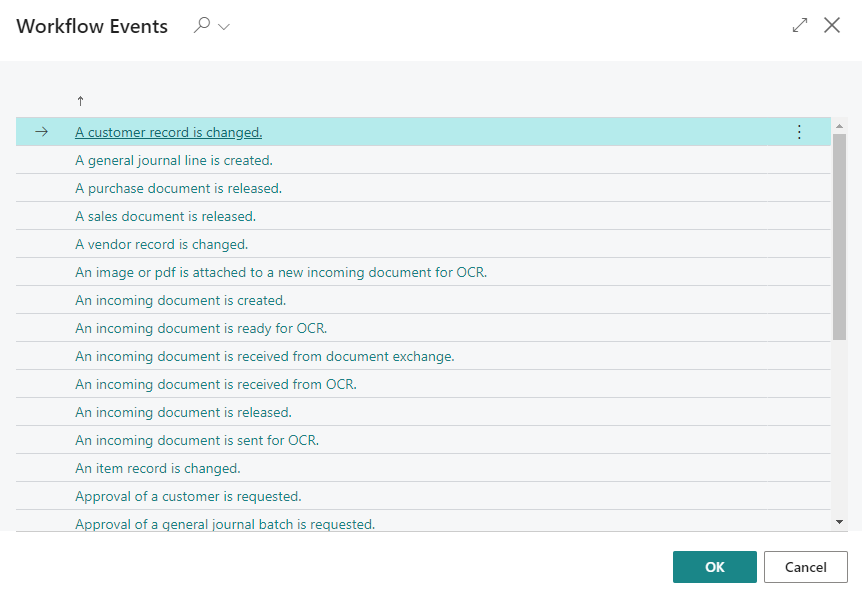
Notice the slight indentation between the first event and the rest of the events. This indicates that any event inside the indentation is dependent on the first event.
Conditions
Conditions let you filter the events. For example, If you have created a Purchase Order Approval Workflow and you want the workflow to be executed only for the records with an amount field greater than $1000 then this condition could be configured in the condition’s window as follows: 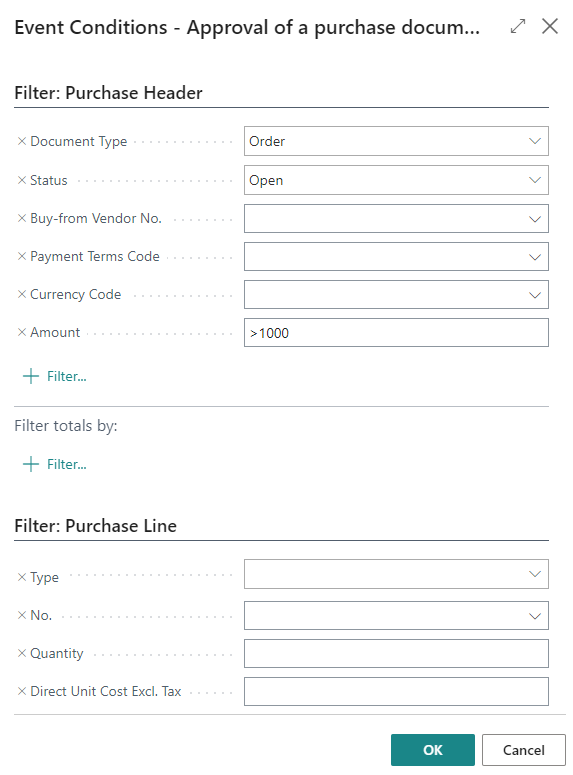
You can add multiple filters in the same way. Custom fields can also be added to the filter.
Responses
If all the event conditions are satisfied, the response steps are executed. Similar to events, there are several predefined responses available to be used. You can combine multiple responses against a single event. For example, when a document is submitted for approval, you may want to restrict the document for further edits, generate a notification, and send it to the approver, and show a message to the user informing about the approval submission. 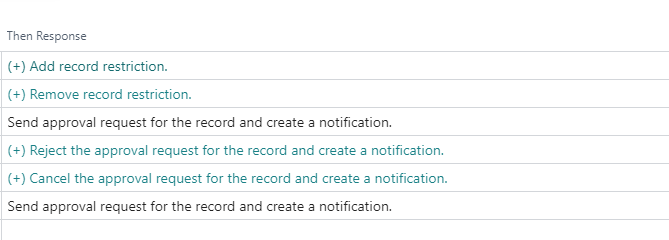
Note: the (+) sign shows there are multiple responses attached to the event.
Expand by clicking on the first response and you will see the following window: 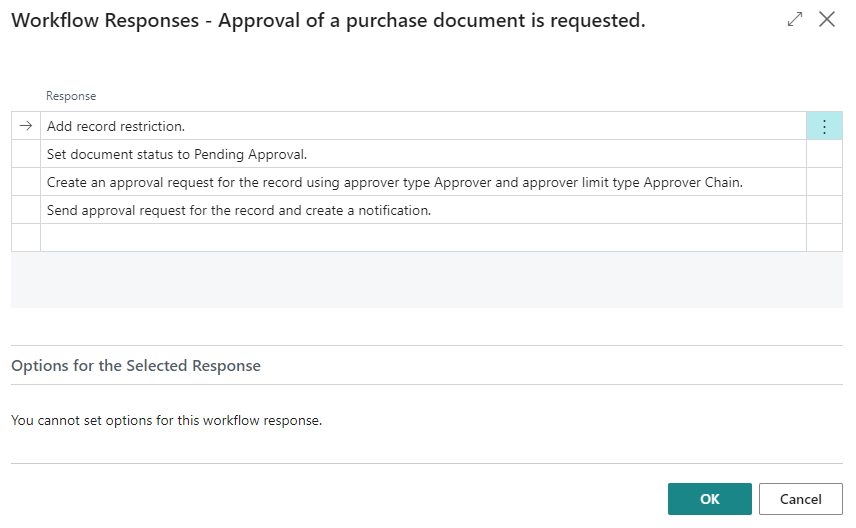
You can select different responses and see the below options based on the selected response.
For example, If we select the “Create an approval request…” then the below options would look like: 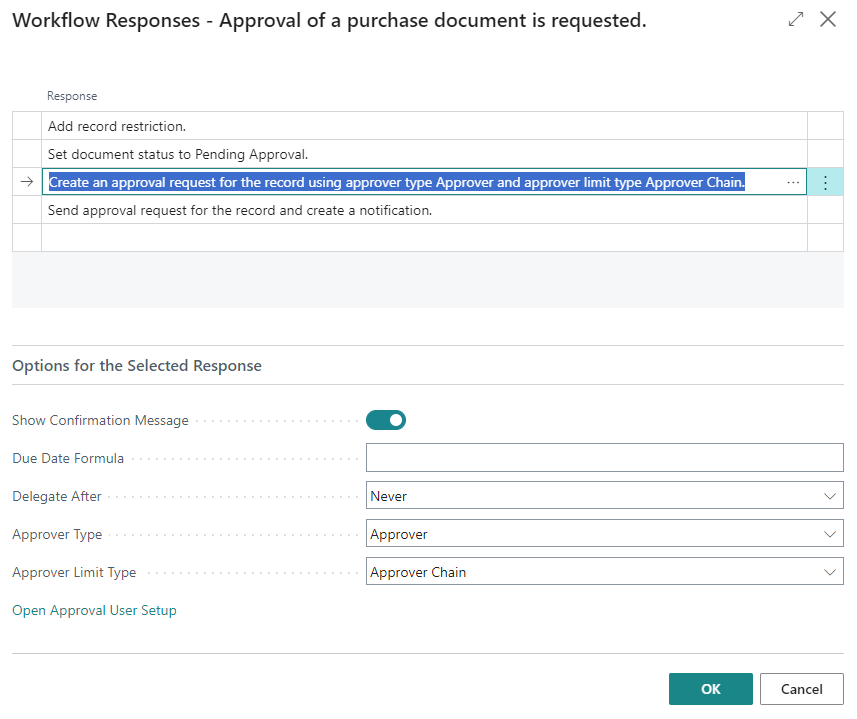
You can select in how many days the request will delegate and set the due date formula. The approver type and approver limit type will be discussed in the next section.
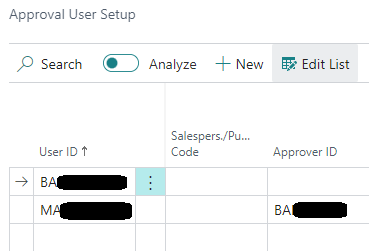
Approval User Setup
Search for the approval user setup and select the highlighted option: 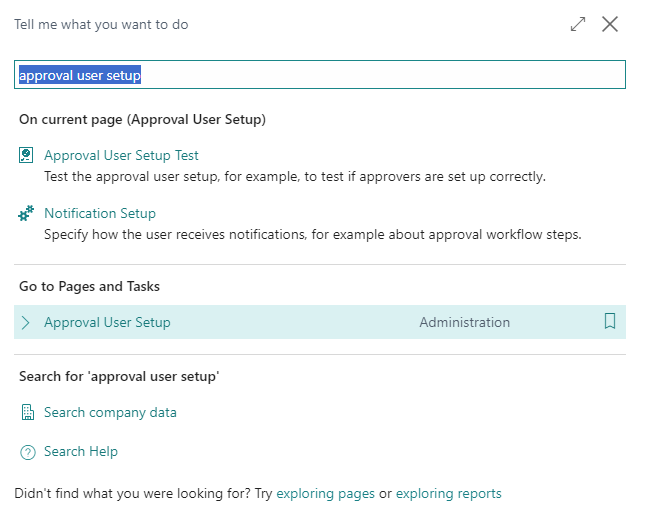
You will see the window below. This might be empty if there is no approval setup. 
The first user “BA***” is the approver admin who has an unlimited approval limit. The second user “MA*****” has limits set to 1000 and 500 for Sales and Purchase amount limits respectively and the Approver ID for this user is set to “BA****”.
Approver Limit Types
If we expand the Approver Limit Type of the response that we selected previously, we see the following:
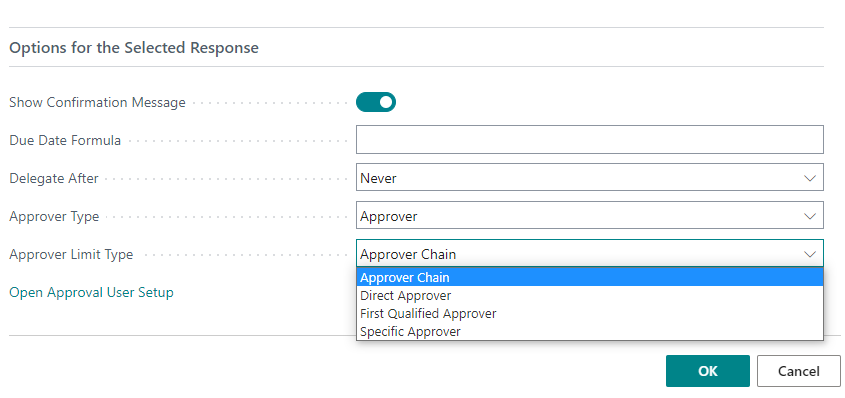
In terms of complexity, we can discuss the above types in the following order:
- Specific approver
- Direct Approver
- Approver Chain
- First qualified Approver
Specific Approver
In this type of approver limit, you can directly assign an approver irrespective of the approval user setup. 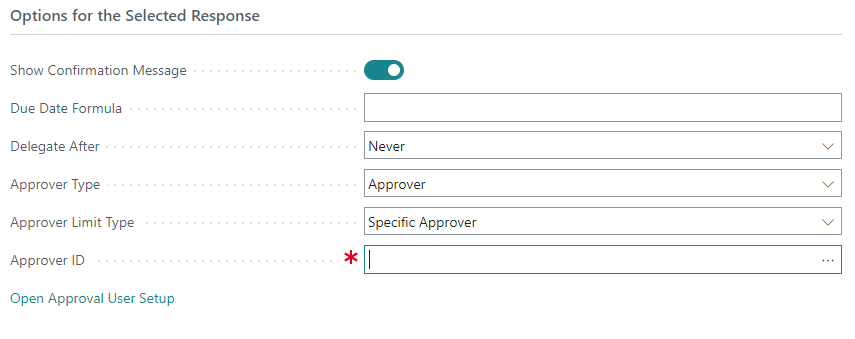
Direct Approver
In this type of setup, the request will directly go to the approver set in the Approval User Setup. The user “MA***” has a direct approver “BA****”.
Approver Chain
In this type, the approval request is created for all the approvers in the hierarchy. For example, consider this simplified approval user setup:
| UserID | Approver | Sales Limit | Purchase Limit |
| User1 | User2 | $100 | $100 |
| User2 | User3 | $500 | $500 |
| User3 | Unlimited | Unlimited |
For User 1, the sales document with an amount less than $100 would be approved automatically. If the sales document amount is between $100 and $500 then the request would be sent for approval to User 2 only, however, if the amount is greater than $500 then the request would be sent to both User 2 and User 3.
You can learn more about the approver types here.
First Qualified Approver
This type is similar to the Approver Chain, the only difference is that the request would be sent directly to the relevant user. For example, for the sales document with an amount greater than $500, the request would only be sent to User 3 since User 3 is the first qualified approver.
Approval Entries
Once an approval has been sent, you can see your submitted approvals in the Approval Entries page.

Conclusion
Business Central Workflows offer significant advantages by streamlining and automating business processes. These workflows enhance efficiency, reduce manual errors, and provide better visibility into the status of tasks. With the ability to customize workflows according to specific business needs, Business Central empowers organizations to achieve greater productivity, faster decision-making, and improved overall operational performance.