In the realm of corporate operations, the transmission of email notifications serves as a fundamental function. This capability becomes particularly crucial when it is executed in response to specific events within Microsoft Dynamics 365 Business Central. In this article, we delve into:
- The intricate process of determining the precise set of users who should be recipients of these email notifications.
- This initial step involves the aggregation of user members into these predefined User Groups.
- Subsequently, an authentication process is necessitated, wherein the user’s email credentials are configured for the purpose of sending out emails.
- Following this authentication procedure, Business Central’s code units are then deployed to orchestrate the distribution of emails to all members belonging to the designated user group.
User Groups
User Groups lay the foundation for this intricate operation. These groups serve as collections of individuals with shared responsibilities or characteristics, and they are instrumental in streamlining the notification process.
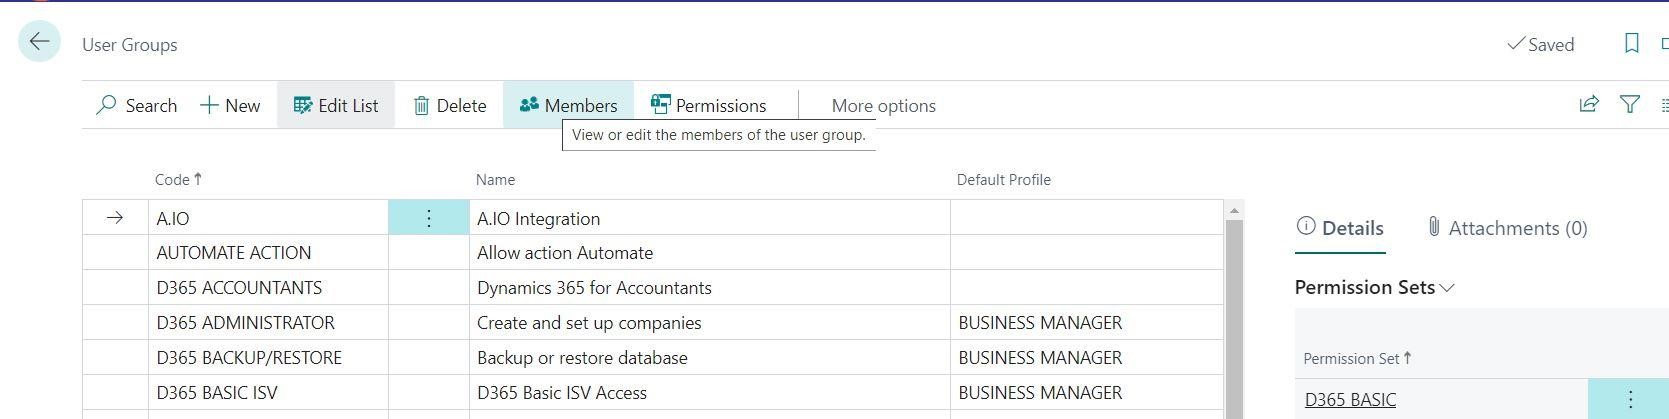
In Business Central, search for user groups. Click on +New to add create new user groups e.g. In below figure, I have added a group A.IO.

User Members
Furthermore, User Members are the constituents of these groups, carefully selected based on their relevance to the event-triggered notifications. In Business Central, on the user group page, go to Members in the navigation bar.
Then on the User Group Members Interface, click on Add Users in navigation bar, by which you will be able to add user members in this user groups e.g. A.IO. 
By doing these steps you will add user members.
Setup an Email Account – Authenticate Email
Setting up an Email Account marks a pivotal step in this operation, as it lays the groundwork for the subsequent email distribution process. The initiation of this setup begins with the exploration of existing Email Accounts within the system. Upon identifying the need for a new account, users can seamlessly create one by selecting the “Add an Email Account” option by searching for Email Accounts in the search bar.

This initiates a Setup Email Wizard, a user-friendly interface designed to facilitate the configuration process. Within this wizard, users are presented with three distinct email setup options, allowing for flexibility in choosing the preferred method for dispatching emails. For the purposes of this module, we will focus on configuring the setup for the current user.

The configuration process unfolds further, with users selecting “Next” to proceed. At this juncture, the option to designate the “Current User” as the entity responsible for sending emails through the setup email account is presented. Choosing this option streamlines the process and ensures that emails are dispatched using the authenticated email account associated with the current user. With this selection made, users advance by clicking “Next” once again, progressing seamlessly to the final phase where the setup is customized to align with the requirements of the current user account. This comprehensive process guarantees that email notifications are delivered accurately and efficiently to the specified User Groups, catering to the specific needs and responsibilities of the targeted recipients.
Email Sending Codeunit Overview
In the context of Business Central, the fundamental operation of sending emails relies on two core codeunits: ‘Email’ and ‘Email Message.’ To create a basic email, we leverage the functionalities of ‘EmailMessage.Create’ and ‘Email.Send.’ An additional layer of sophistication is introduced through the custom enum ‘F3VytEmailNotificationType,’ which allows precise categorization of notification types.. The final code will look like the following.


Our process begins by selecting the newly established A.IO user group, ensuring that only pertinent user members are recipients of these notifications. Within the ‘EmailMessage.Create()’ function, critical details such as the recipient’s email address, subject, and email body must be supplied. The resultant ‘EmailMessage’ object is subsequently passed to the ‘Email’ codeunit.
Notably, our approach incorporates the innovative ‘Email Scenario’ feature. This feature grants us the flexibility to specify which emails correspond to particular documents, effectively separating email accounts from the email dispatch process. Configuration of this feature is conveniently accessible through the ‘Email Scenario Assignment’ page, marking a significant advancement in streamlining email notifications.

Summary:
This article discusses the essential process of sending email notifications in Microsoft Dynamics 365 Business Central, focusing on delivering these notifications to specific users. The method involves utilizing User Groups and configuring user email accounts for authentication. Business Central codeunits are employed for sending emails to designated user groups. Additionally, the article explores the use of ‘EmailMessage.Create’ and ‘Email.Send’ functions to create emails, introduces the custom enum ‘F3VytEmailNotificationType’ for defining notification types, and emphasizes the ‘Email Scenario’ feature to decouple email accounts from sending emails. This feature’s configuration is accessible through the ‘Email Scenario Assignment’ page, enhancing the precision of email notifications.