Microsoft Dynamics 365 Business Central to Shopify ComAX connector
Document Overview
The purpose of this document is to highlight the scope and functionalities supported out of box by Folio3 ComAX Connector standing as middleware between Dynamics 365 Business Central and Shopify.
Included in this document are:
- An overview of the Folio3’s Shopify Connector for Dynamics 365 Business Central
- Out of box functionalities Supported
- Product Create.
- Product Update.
- Inventory Sync.
- Sales Order Sync.
- Customer Sync.
- Order Sync.
- Sales order status update.
- Trade Agreements syncing.
Shopify Microsoft Dynamics 365 Business Central ComAX Connector
The Folio3 ComAX Connector will be used to sync products, inventory, orders, customers, shipping, and payments between Shopify e-commerce store and Microsoft Dynamics 365 for Finance & Operations.
Folio3’s proprietary Dynamics 365 Business Central Shopify Connector is an Integration-as-a-Service product that provides fully automated integration between Shopify and Dynamics 365. The Folio3 Dynamics 365 Business Central Shopify Connector helps you save valuable time and effort that is typically lost in manually keeping your Shopify and Dynamics 365 Business Central accounts in sync, allowing you to focus on enhancing sales and managing fulfillment and other key business functions.
Features Include:
- Automatically imports all ‘checkout complete’ orders along with the associated customer, from Shopify into Dynamics 365 Business Central
- Automatically create/update Products along with one level pricing (default price which is defined on product) from Dynamics 365 Business Central to Shopify
- Automatically updates the status of fulfilled sales orders from Dynamics 365 Business Central, in Shopify
- Automatically imports all customer, from Shopify into Dynamics 365 Business Central
- Automatically exports shipping information (shipping date, carrier details & tracking number) of fulfilled sales orders from Dynamics 365 Business Central to Shopify
- Maintains a complete log of all tasks performed in Dynamics 365 Business Central and Shopify
- Monitor the status of each service which is responsible to sync data Dynamics 365 Business Central and Shopify.
Shopify Dynamics 365 Business Central Integration – Out of Box Functionality
The Dynamics 365 Business Central -Shopify integration project scope covers the following out of box functionality broken down by modules and related tasks:
| Module | Direction | Task |
| Customers | ||
| Shopify to DYNAMICS 365 BUSINESS CENTRAL | ||
| Create | ||
| Update | ||
| Billing Address Creation | ||
| Billing Address Update | ||
| Shipping Address Creation | ||
| Shipping Address Update | ||
| Contact Info (Email, Phone) | ||
| Orders | ||
| Shopify to DYNAMICS 365 BUSINESS CENTRAL | ||
| Sales Order Creation | ||
| Order Status | ||
| Payment Status (Authorized, Captured etc.) | ||
| Store Credit | ||
| Simple Products | ||
| Bundle Products | ||
| DYNAMICS 365 BUSINESS CENTRAL to Shopify | ||
| Order fulfillment | ||
| Shipment Tracking Info and Status (Carrier Name, Tracking Number, Ship Date) | ||
| ● Pending | ||
| ● Processing | ||
| ● Complete | ||
| Sales Order Cancellation | ||
| Products & Inventory | ||
| DYNAMICS 365 BUSINESS CENTRAL to Shopify | ||
| Simple Product Creation & Update | ||
| ● Item Number/SKU | ||
| ● Price | ||
| ● Weight | ||
| ● Inventory update | ||
| o Quantity | ||
| DYNAMICS 365 BUSINESS CENTRAL to Shopify | ||
| Configurable Products | ||
| Payments | ||
| Shopify to DYNAMICS 365 BUSINESS CENTRAL | ||
| Payment Methods | ||
| ● Credit Card ● PayPal ● Store Credit | ||
| Shipping | ||
| Shopify to DYNAMICS 365 BUSINESS CENTRAL | ||
| Shipping Method | ||
| DYNAMICS 365 BUSINESS CENTRAL to Shopify | ||
| Shipment status update | ||
| Shipment tracking number1, ship date, carrier name & service | ||
| Others | ||
| DYNAMICS 365 BUSINESS CENTRAL to Shopify | ||
| Simple Trade Agreements |
1 single parcel tracking per shipment
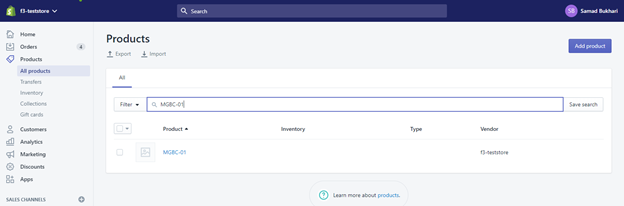
Simple Product Create
1) In Business central navigate to Items.
2) Click on new button.
3) Select a template for new item.
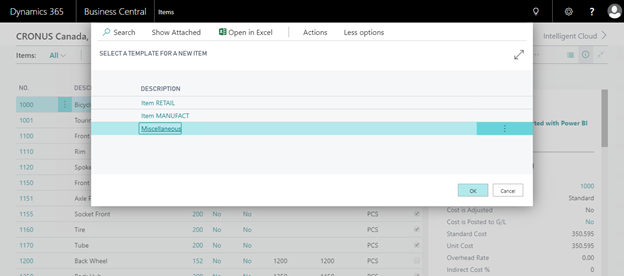
4) A product detail page will be opened. Enter product details, amount and press edit/save button on top.
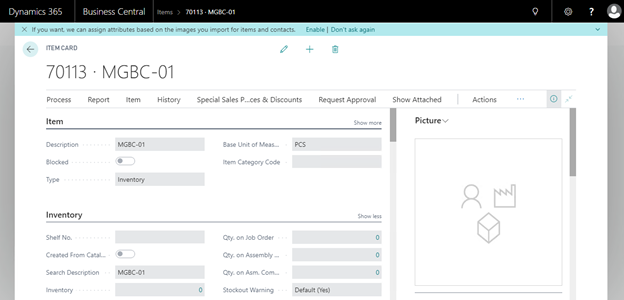
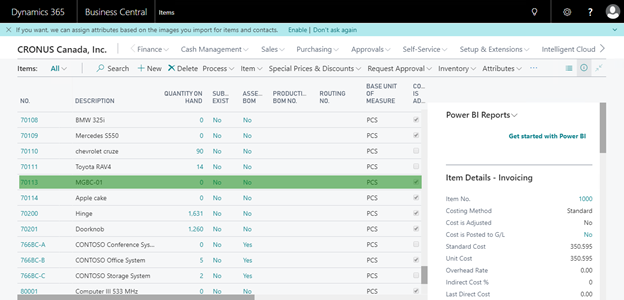
5) Check the list view of product in Business Central for recently created products.
6) After saving a product, comax connector will sync the product in Ecom store. Logs will be generated in Live feeds screen of connector.

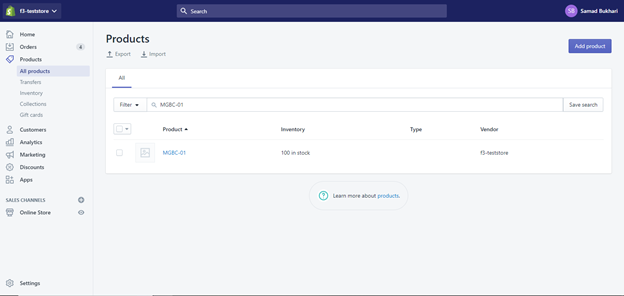
7) Now open Shopify admin panel and navigate to Products page. Here we can search our recently synced products.
Inventory Sync:
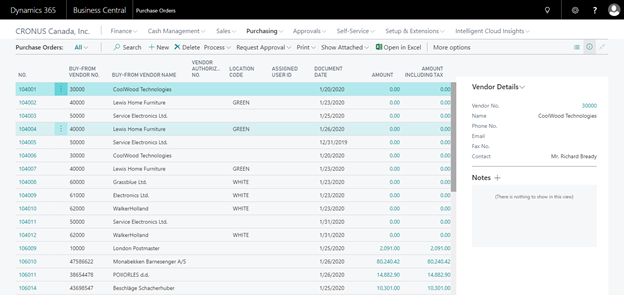
1) In Business central Open dropdown of Purchasing and click on Purchase Orders.
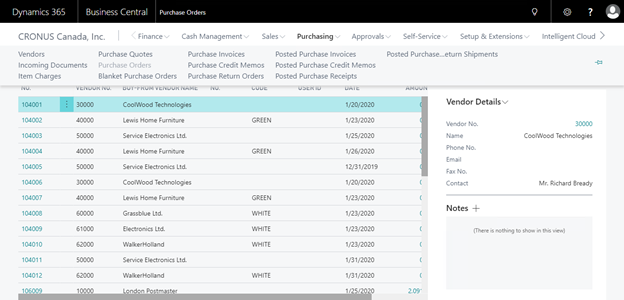
2) This will open a list view of all previous Purchase orders.
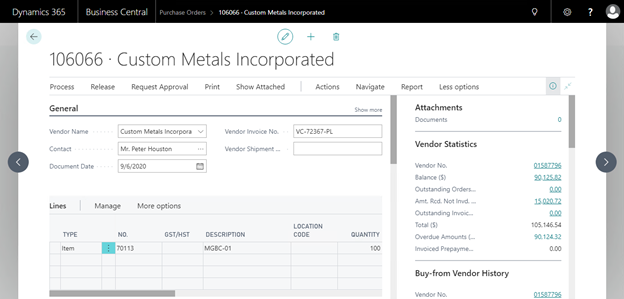
3) Click on New button. This will open a Purchase order create screen.
4) Fill the following fields to create a purchase order. We are using the same product we recently created.
- Vendor name
- Vendor Invoice number
Under Lines section,
- Select Type as Item
- Enter Product number in NO. field
- Enter Quantity and press edit/save button.
5) Now click on Process button on top and click on Post button.

6) This will open a pop up widnow, select Receive radio button and press OK.

7) After pressing OK button, comax connector will sync the product inventory in Ecom store. Logs will be generated in Live feeds screen of connector.
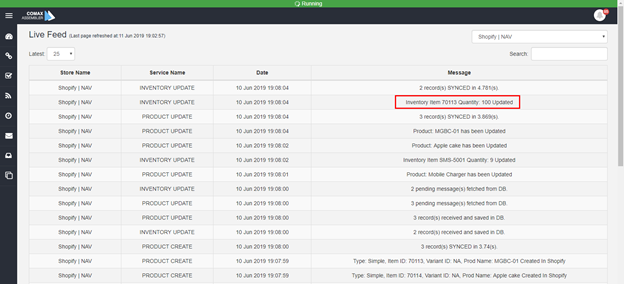
8) Now open Shopify admin panel and navigate to Products page. Here we can search our recently synced product inventory.
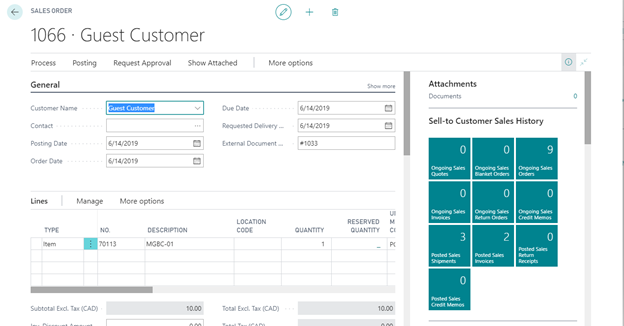
Sales Order Create
1) Open Shopify store front and search the product we recently created.
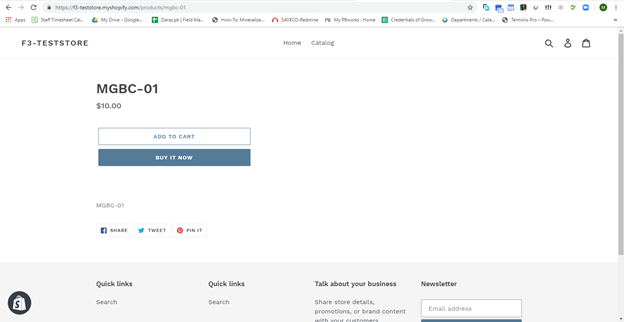
2) Open the product page and purchase the product.
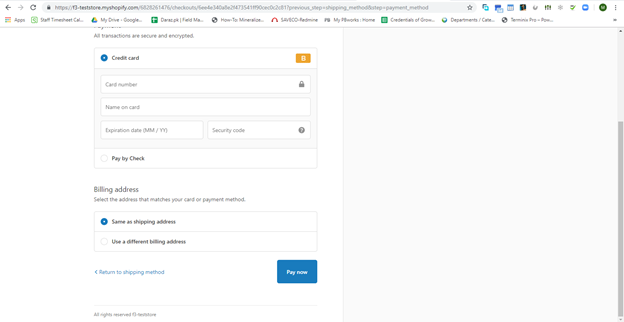
3) Click on add to cart button and press checkout.
4) Fill in the shipping address and credit card details and click on pay now.
5) Later it will show a confirmation message with order number.
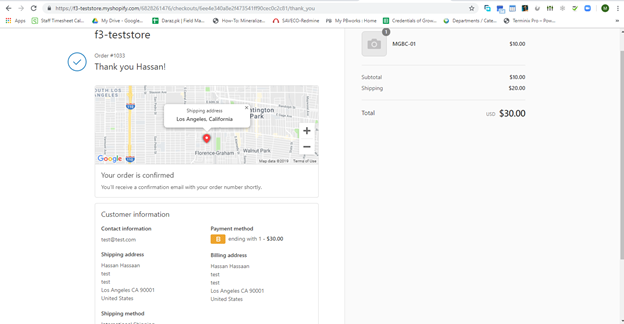
6) ComAX Connector will sync this sales order in Dynamics 365 Business Central.

7) In Business central Open dropdown of Sales and click on Sales Orders.
8) Search for the sales order number.
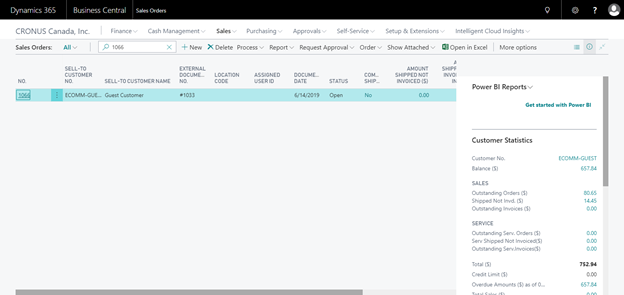
9) Click on sales order and verify details.